一、前言
最近公司项目准备开始重构,框架选定为 Spring Boot ,本篇主要记录了在 IDEA 中搭建 Spring Boot Maven 多模块项目的过程。
二、软件及硬件环境
- macOS Sierra 10.12.6
- IntelliJ IDEA 2018.2
- JDK 1.8
- Maven 3.2.1
- Spring Boot 2.0.4
三、项目结构
- biz 层(业务逻辑层)
- dao 层(数据持久层)
- common 层(公用组件层)
- web 层(请求处理层)
注:biz 层依赖 dao 及 common 层, web 层依赖 biz 层
四、项目搭建
4.1 创建父工程
① IDEA 主面板选择菜单「Create New Project 」或者工具栏选择菜单「 File -> New -> Project… 」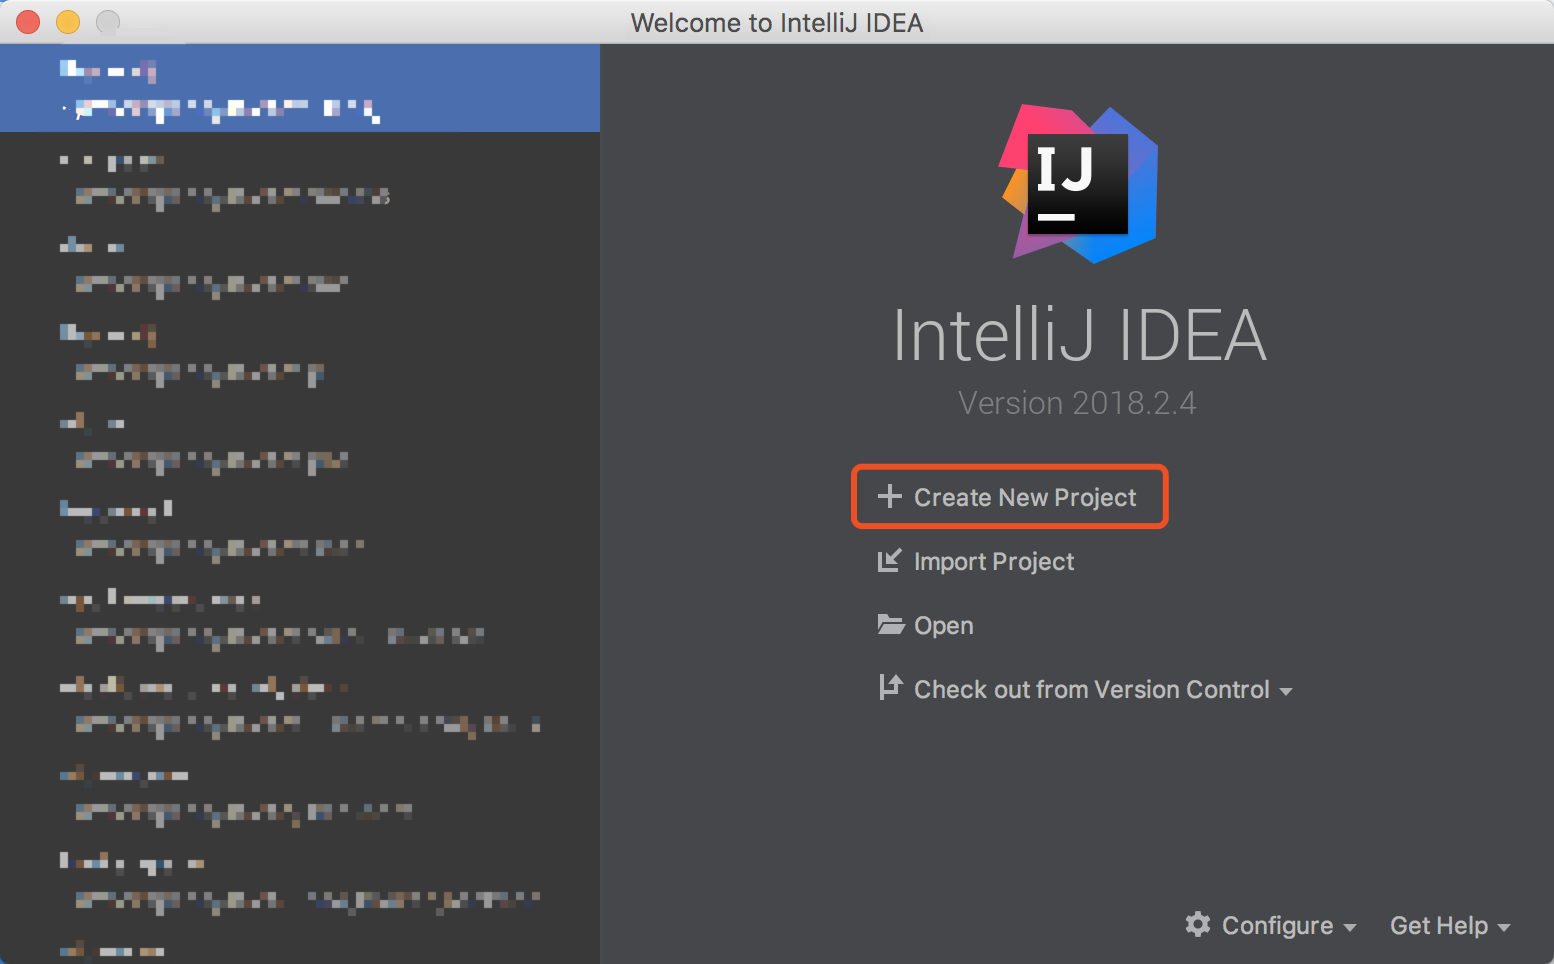
② 侧边栏选择「 Spring Initializr 」,Initializr 默认选择 Default ,然后点击「 Next 」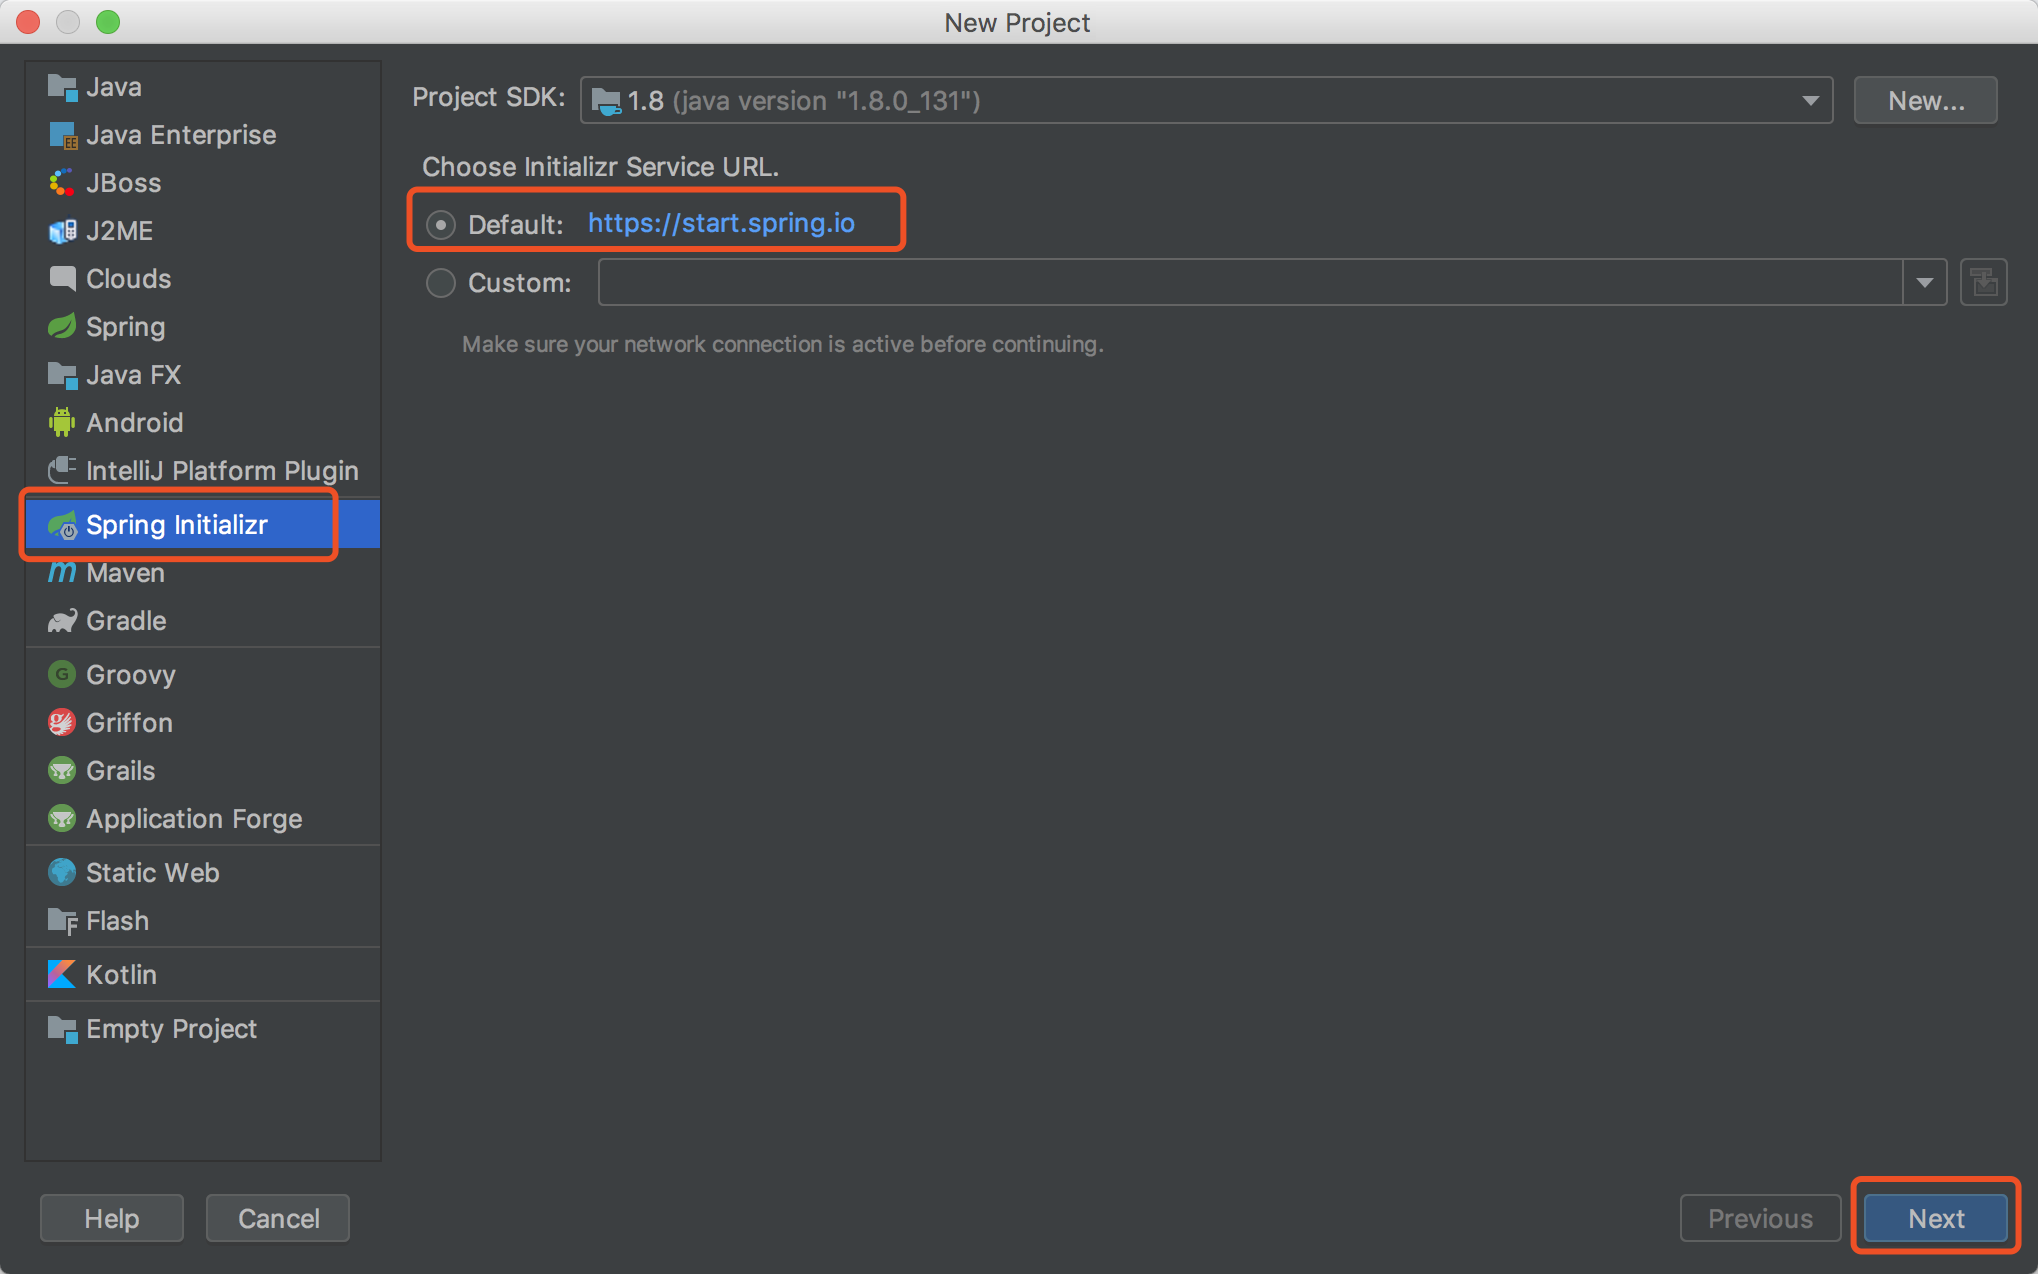
③ 修改 Group 、 Artifact 、 Package 输入框中的值后点击「 Next 」
④ 这步暂时先不需要选择,直接点「 Next 」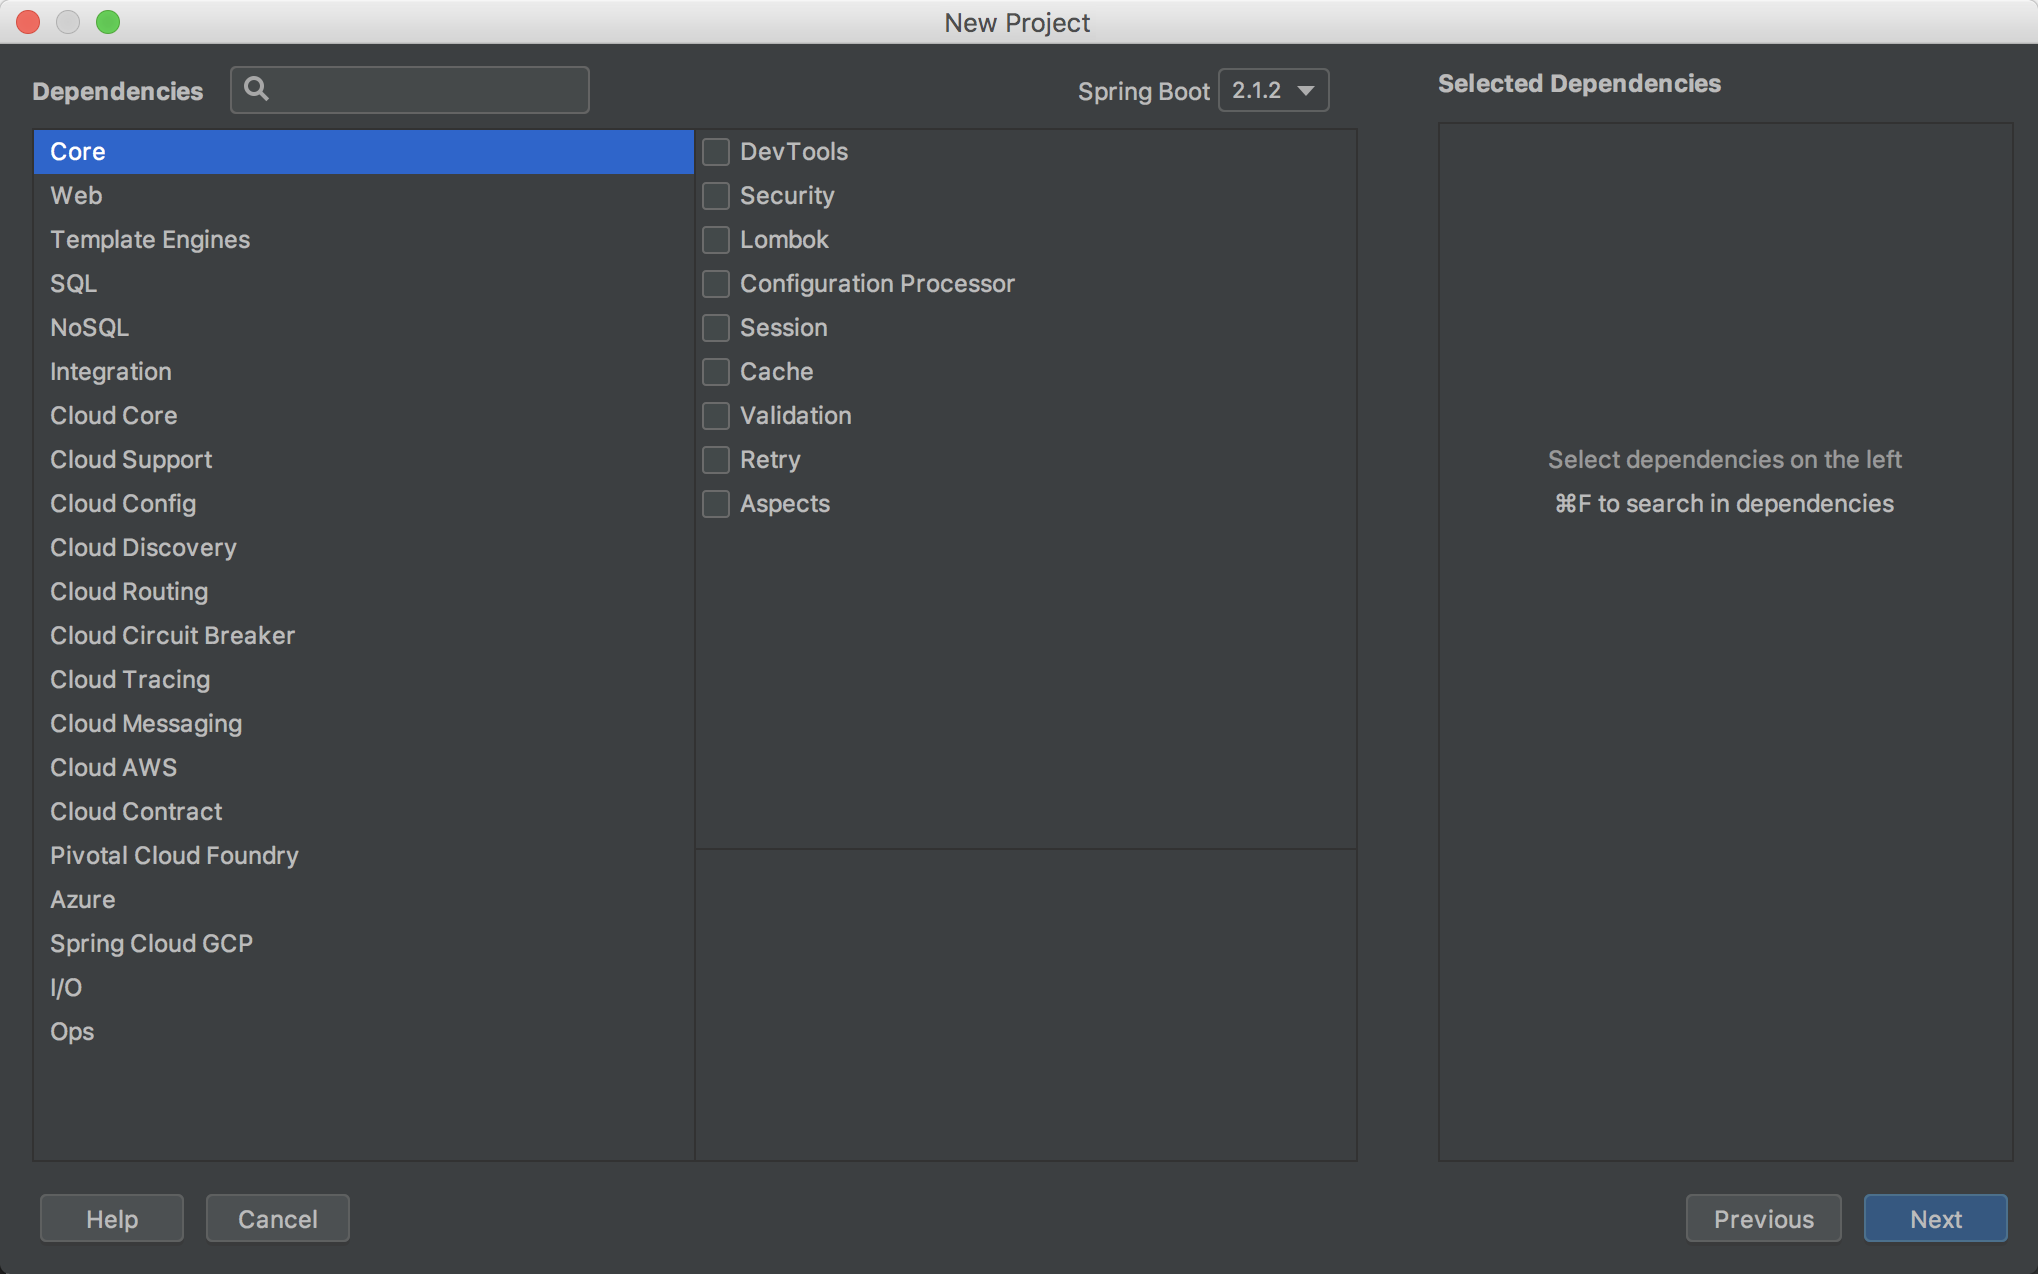
⑤ 点击「 Finish 」创建项目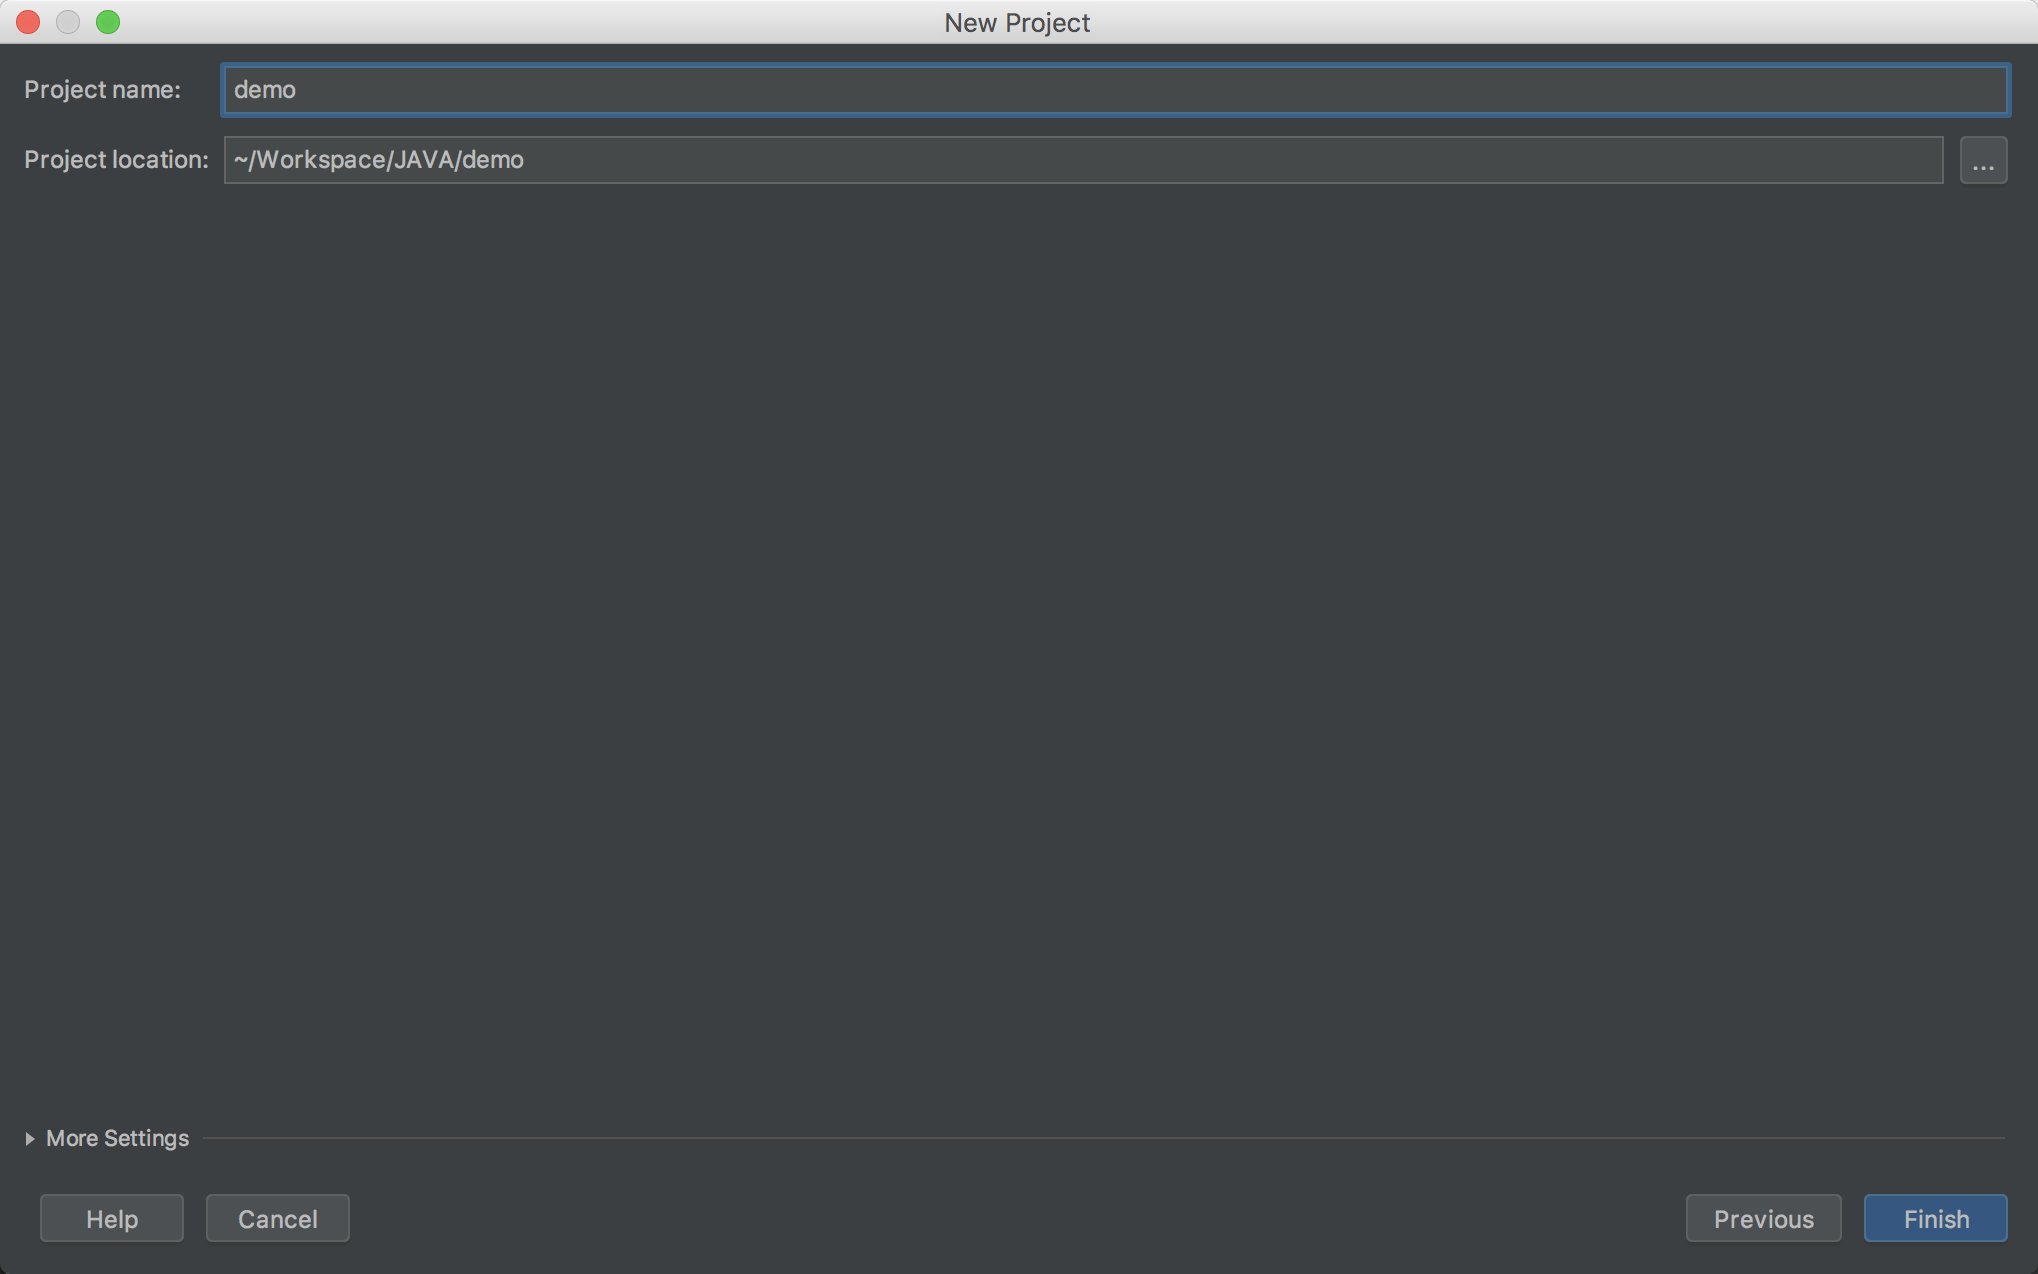
⑥ 最终得到的项目目录结构如下1
2
3
4
5
6
7
8
9
10
11
12
13
14
15
16
17
18
19
20
21
22
23
24|-- demo
|-- .gitignore
|-- mvnw
|-- mvnw.cmd
|-- pom.xml
|-- .mvn
| |-- wrapper
| |-- maven-wrapper.jar
| |-- maven-wrapper.properties
|-- src
|-- main
| |-- java
| | |-- com
| | |-- example
| | |-- demo
| | |-- DemoApplication.java
| |-- resources
| |-- application.properties
|-- test
|-- java
|-- com
|-- example
|-- demo
|-- DemoApplicationTests.java
⑦ 删除无用的 .mvn 目录、 src 目录、 mvnw 及 mvnw.cmd 文件,最终只留 .gitignore 和 pom.xml
4.2 创建子模块
① 选择项目根目录,右键呼出菜单,选择「 New -> Module 」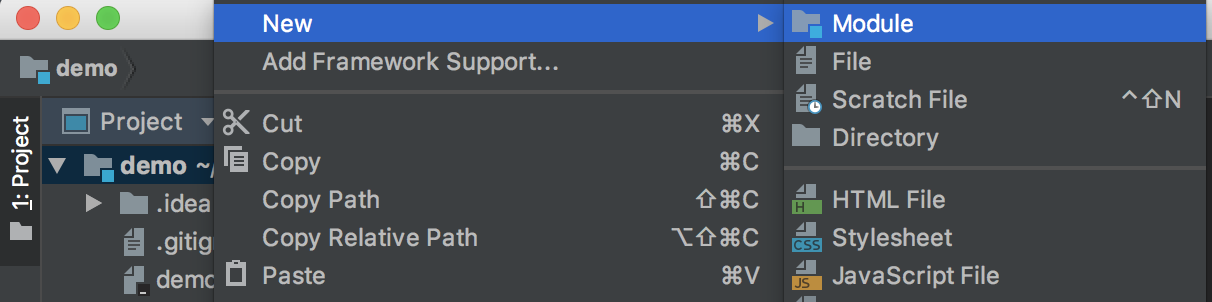
② 侧边栏选择「 Maven 」,点击「 Next 」
③ 填写 ArifactId ,点击「 Next 」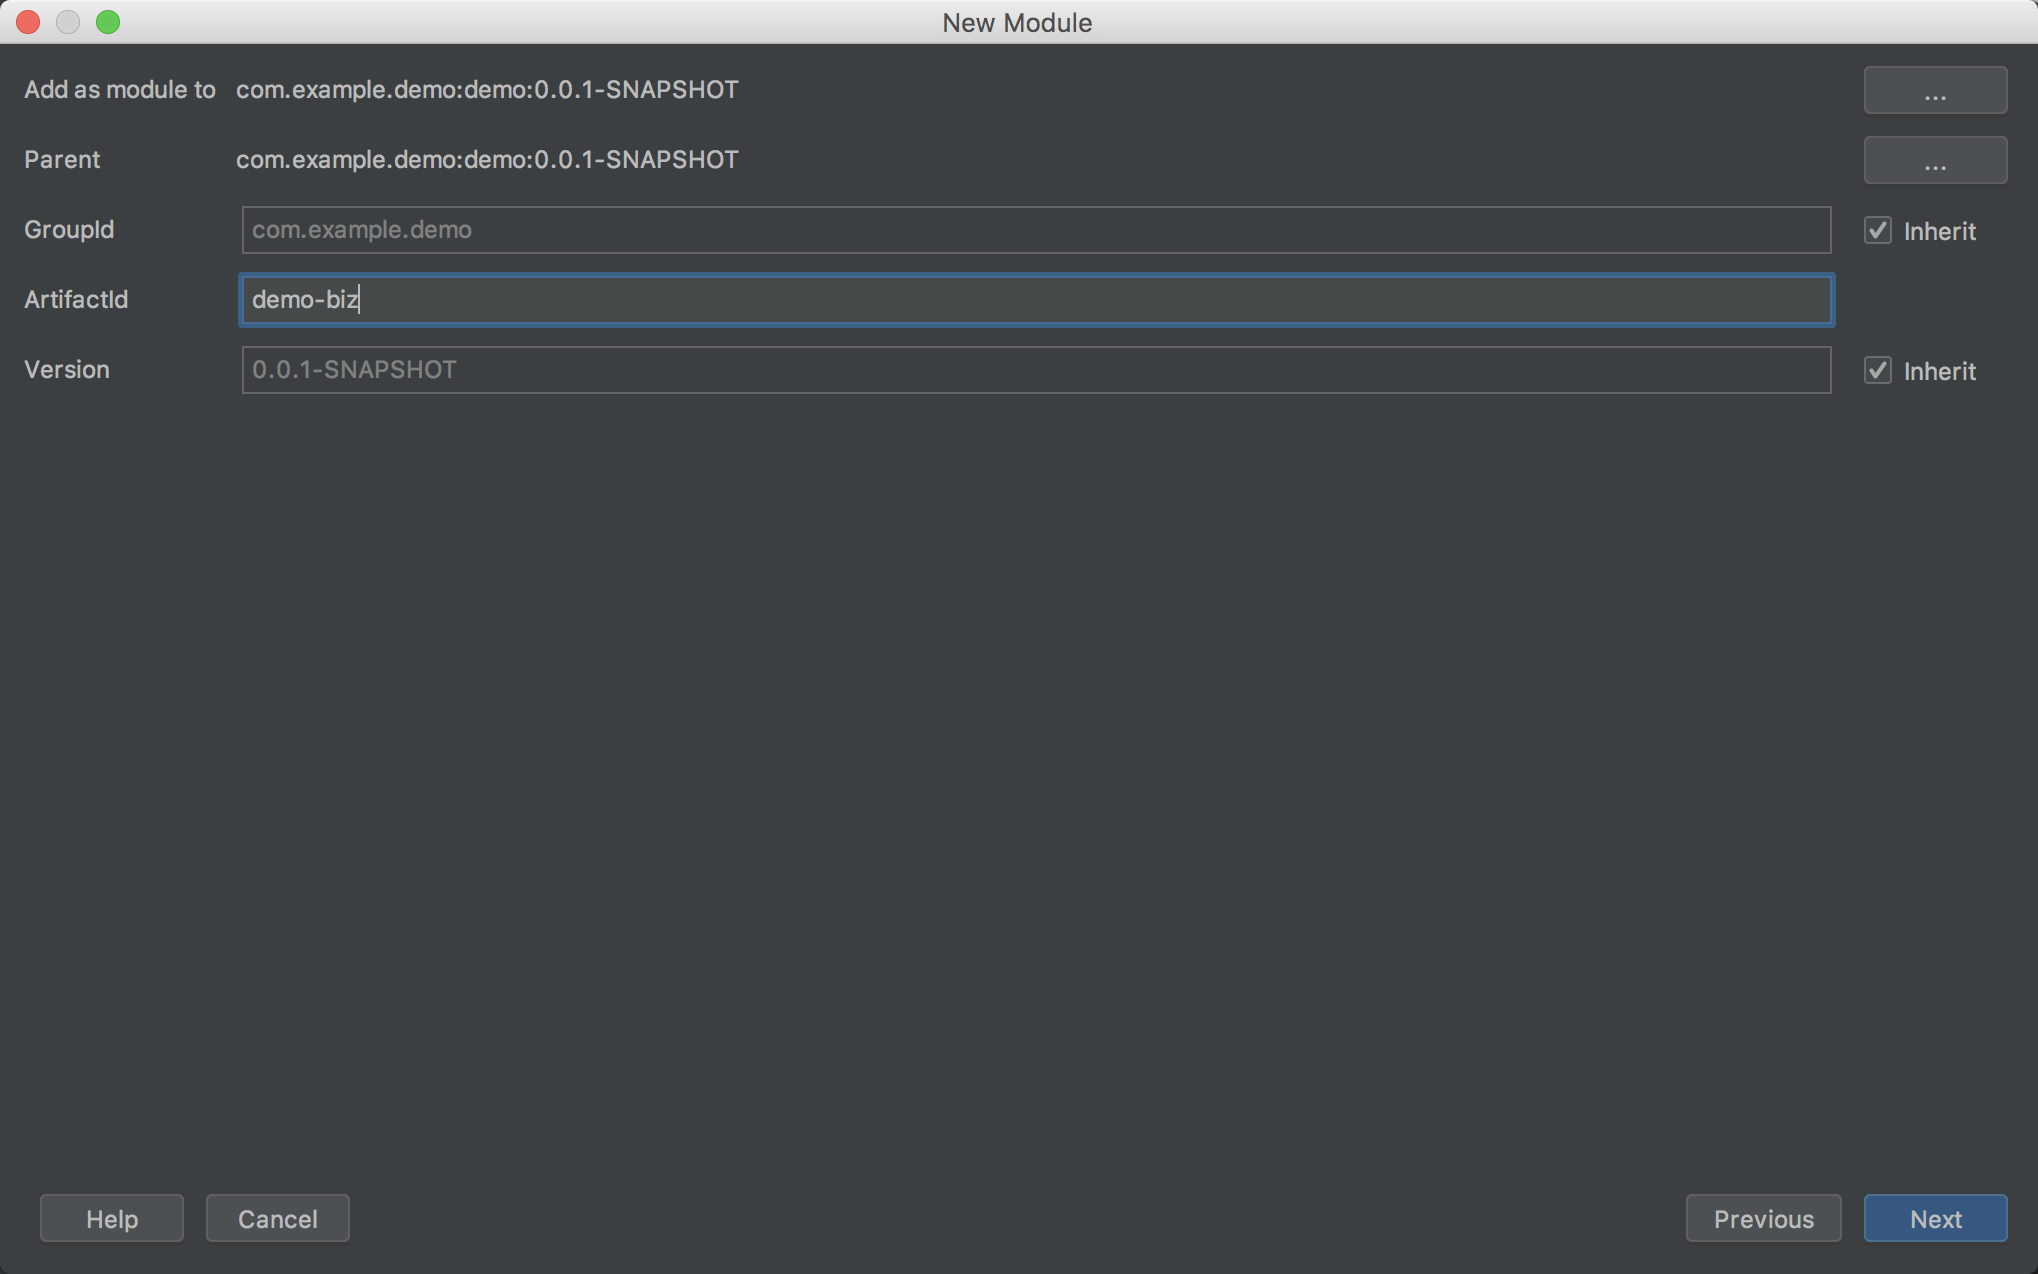
④ 修改 Module name 增加横杠提升可读性,点击「 Finish 」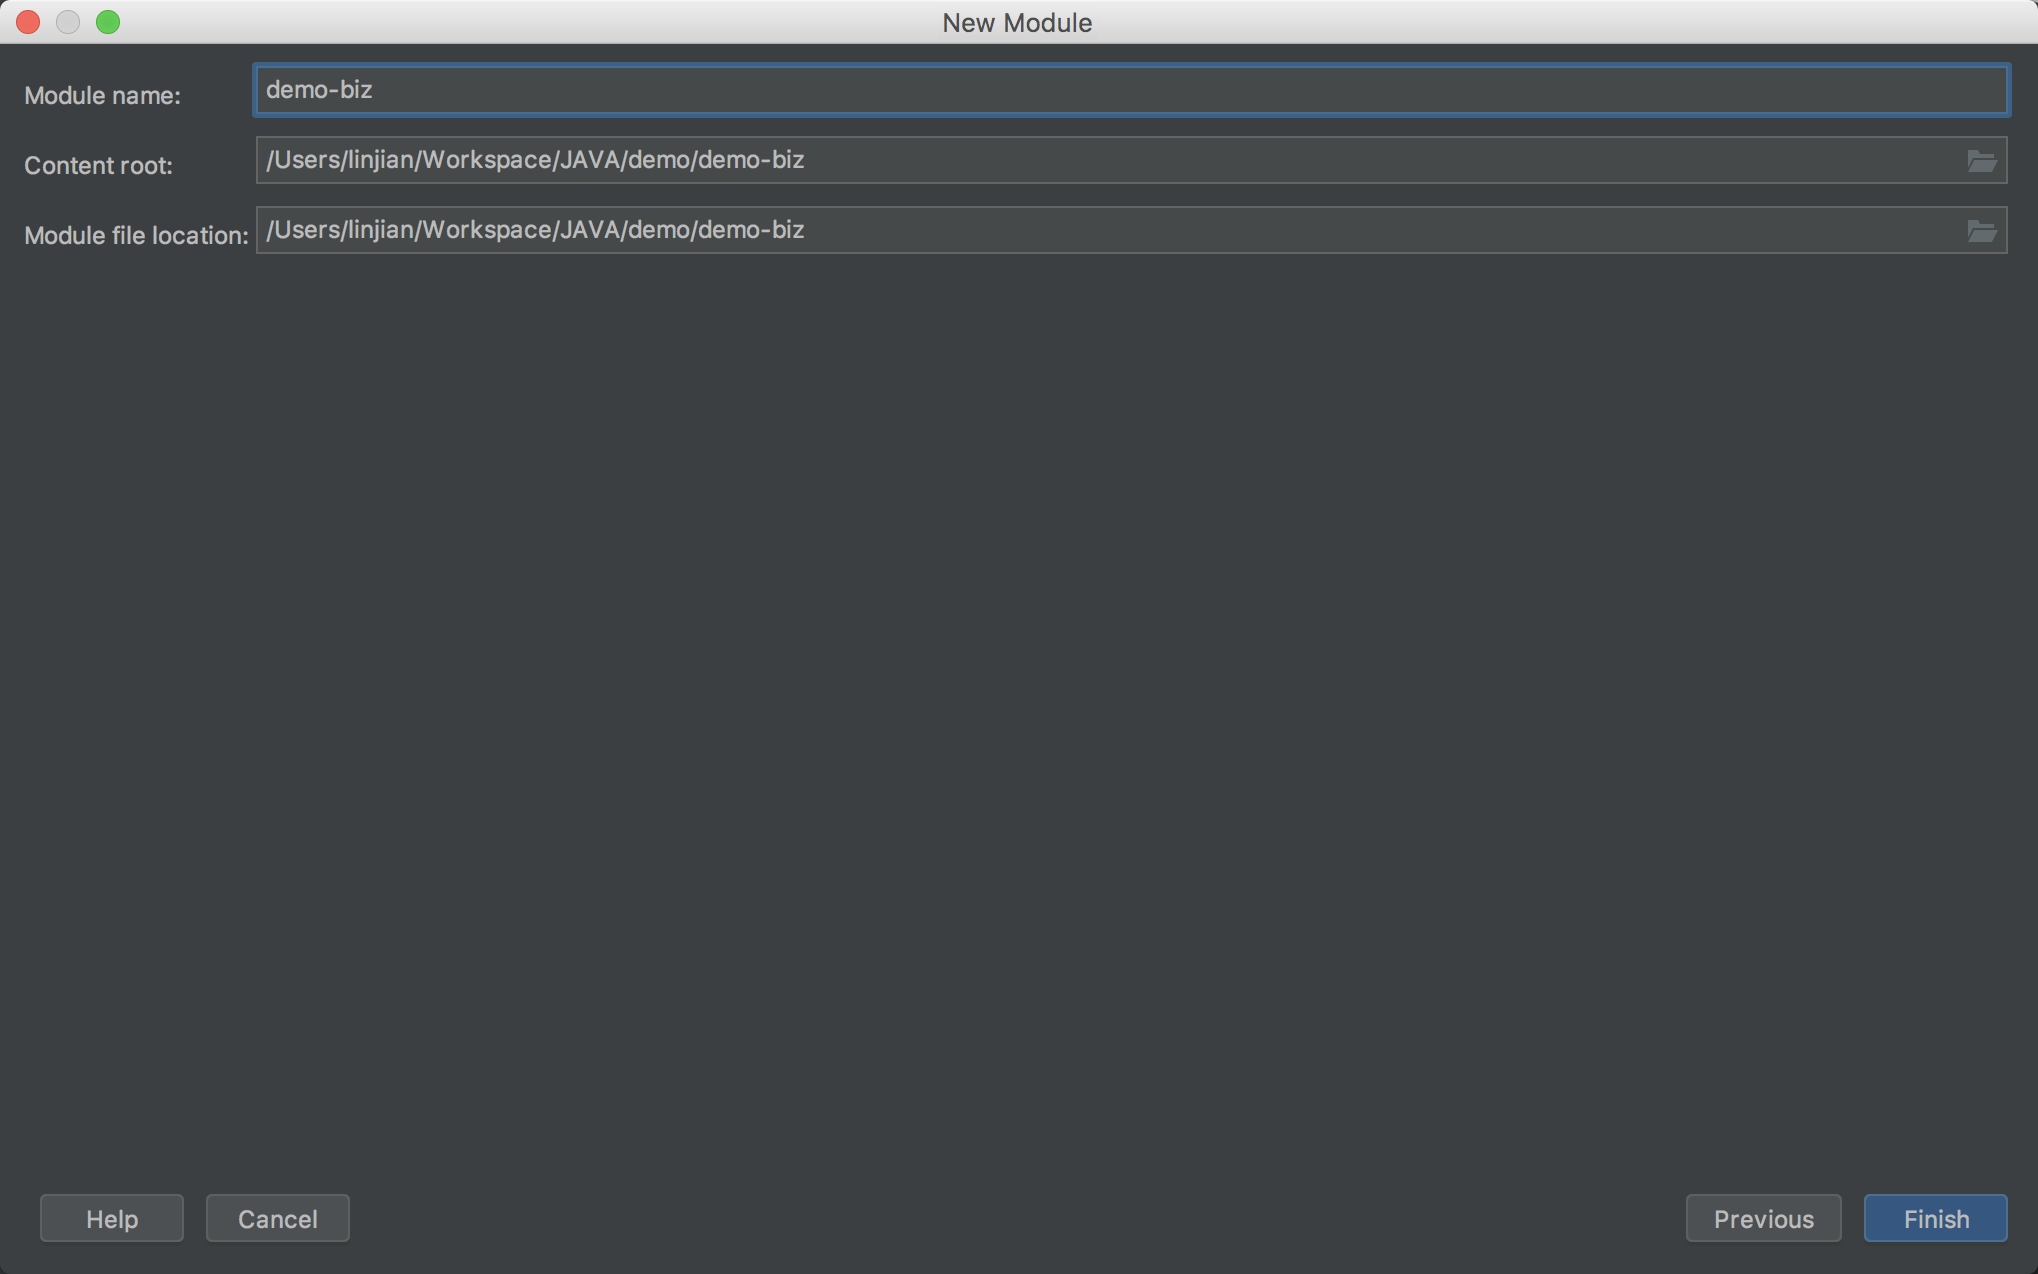
⑤ 同理添加「 demo-dao 」、「 demo-common 」、「 demo-web 」子模块,最终得到项目目录结构如下1
2
3
4
5
6
7
8
9
10
11
12
13
14
15
16
17
18
19
20
21
22
23
24
25
26
27
28
29
30
31
32
33
34
35|-- demo
|-- .gitignore
|-- pom.xml
|-- demo-biz
| |-- pom.xml
| |-- src
| |-- main
| | |-- java
| | |-- resources
| |-- test
| |-- java
|-- demo-common
| |-- pom.xml
| |-- src
| |-- main
| | |-- java
| | |-- resources
| |-- test
| |-- java
|-- demo-dao
| |-- pom.xml
| |-- src
| |-- main
| | |-- java
| | |-- resources
| |-- test
| |-- java
|-- demo-web
|-- pom.xml
|-- src
|-- main
| |-- java
| |-- resources
|-- test
|-- java
4.3 整理父 pom 文件中的内容
① 删除 dependencies 标签及其中的 spring-boot-starter 和 spring-boot-starter-test 依赖,因为 Spring Boot 提供的父工程已包含,并且父 pom 原则上都是通过 dependencyManagement 标签管理依赖包。
注:dependencyManagement 及 dependencies 的区别自行查阅文档
② 删除 build 标签及其中的所有内容,spring-boot-maven-plugin 插件作用是打一个可运行的包,多模块项目仅仅需要在入口类所在的模块添加打包插件,这里父模块不需要打包运行。而且该插件已被包含在 Spring Boot 提供的父工程中,这里删掉即可。
③ 最后整理父 pom 文件中的其余内容,按其代表含义归类,整理结果如下:1
2
3
4
5
6
7
8
9
10
11
12
13
14
15
16
17
18
19
20
21
22
23
24
25
26
27
28
29
30
31
32<!-- 基本信息 -->
<modelVersion>4.0.0</modelVersion>
<packaging>pom</packaging>
<name>demo</name>
<description>Demo project for Spring Boot</description>
<!-- 项目说明:这里作为聚合工程的父工程 -->
<groupId>com.example.demo</groupId>
<artifactId>demo</artifactId>
<version>0.0.1-SNAPSHOT</version>
<!-- 继承说明:这里继承Spring Boot提供的父工程 -->
<parent>
<groupId>org.springframework.boot</groupId>
<artifactId>spring-boot-starter-parent</artifactId>
<version>2.1.2.RELEASE</version>
<relativePath/>
</parent>
<!-- 模块说明:这里声明多个子模块 -->
<modules>
<module>demo-biz</module>
<module>demo-common</module>
<module>demo-dao</module>
<module>demo-web</module>
</modules>
<!-- 属性说明 -->
<properties>
<java.version>1.8</java.version>
<demo.version>0.0.1-SNAPSHOT</demo.version>
</properties>
4.4 简易 HTTP 接口测试
准备工作都完成之后,通过一个简易的 HTTP 接口测试项目是否正常运行。
① 首先在 demo-web 层创建 com.example.demo.web 包并添加入口类 DemoWebApplication.java
注:com.example.demo.web 为多级目录结构并非单个目录名
1 | package com.example.demo.web; |
② 其次在 demo-web 层的 pom 文件中添加必要的依赖包1
2
3
4
5
6<dependencies>
<dependency>
<groupId>org.springframework.boot</groupId>
<artifactId>spring-boot-starter-web</artifactId>
</dependency>
</dependencies>
② 然后在 com.example.demo.web 包中添加 controller 目录并新建一个 controller,添加 test 方法测试接口是否可以正常访问。1
2
3
4
5
6
7
8
9
10
11
12
13
14
15
16
17
18
19package com.example.demo.web.controller;
import org.springframework.web.bind.annotation.GetMapping;
import org.springframework.web.bind.annotation.RequestMapping;
import org.springframework.web.bind.annotation.RestController;
/**
* @author linjian
* @date 2019/1/15
*/
("demo")
public class DemoController {
("test")
public String test() {
return "Hello World!";
}
}
③ 最后运行 DemoWebApplication 类中的 main 方法启动项目,默认端口为 8080,访问 http://localhost:8080/demo/test 即可测试接口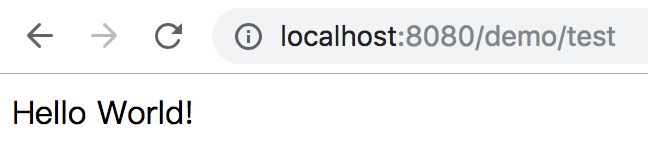
4.5 配置模块间的依赖关系
通常 JAVA Web 项目会按照功能划分不同模块,模块之间通过依赖关系进行协作,下面将完善模块之间的依赖关系。
① 首先在父 pom 文件中使用「 dependencyManagement 」标签声明所有子模块依赖1
2
3
4
5
6
7
8
9
10
11
12
13
14
15
16
17
18
19
20
21
22
23
24
25<!-- 依赖管理:这里统一管理依赖的版本号 -->
<dependencyManagement>
<dependencies>
<dependency>
<groupId>com.example.demo</groupId>
<artifactId>demo-biz</artifactId>
<version>${demo.version}</version>
</dependency>
<dependency>
<groupId>com.example.demo</groupId>
<artifactId>demo-common</artifactId>
<version>${demo.version}</version>
</dependency>
<dependency>
<groupId>com.example.demo</groupId>
<artifactId>demo-dao</artifactId>
<version>${demo.version}</version>
</dependency>
<dependency>
<groupId>com.example.demo</groupId>
<artifactId>demo-web</artifactId>
<version>${demo.version}</version>
</dependency>
</dependencies>
</dependencyManagement>
注:${demo.version} 定义在 properties 标签中
② 其次在 demo-biz 层中的 pom 文件中添加 demo-dao 及 demo-common 依赖1
2
3
4
5
6
7
8
9
10<dependencies>
<dependency>
<groupId>com.example.demo</groupId>
<artifactId>demo-common</artifactId>
</dependency>
<dependency>
<groupId>com.example.demo</groupId>
<artifactId>demo-dao</artifactId>
</dependency>
</dependencies>
③ 之后在 demo-web 层中的 pom 文件中添加 demo-biz 依赖1
2
3
4
5
6<dependencies>
<dependency>
<groupId>com.example.demo</groupId>
<artifactId>demo-biz</artifactId>
</dependency>
</dependencies>
4.6 web 层调用 biz 层接口测试
模块依赖关系配置完成之后,通过 web 层 测试下 biz 层的接口是否可以正常调用。
① 首先在 demo-biz 层创建 com.example.demo.biz 包,添加 service 目录并在其中创建 DemoService 接口类及 impl 目录(用于存放接口实现类)。1
2
3
4
5
6
7
8
9
10package com.example.demo.biz.service;
/**
* @author linjian
* @date 2019/1/15
*/
public interface DemoService {
String test();
}
1 | package com.example.demo.biz.service.impl; |
② DemoController 通过 @Autowired 注解注入 DemoService ,修改 DemoController 的 test 方法使之调用 DemoService 的 test 方法1
2
3
4
5
6
7
private DemoService demoService;
("test")
public String test() {
return demoService.test();
}
③ 再次运行 DemoWebApplication 类中的 main 方法启动项目,发现如下报错1
2
3
4
5
6
7
8
9
10
11
12
13***************************
APPLICATION FAILED TO START
***************************
Description:
Field demoService in com.example.demo.web.controller.DemoController required a bean of type 'com.example.demo.biz.service.DemoService' that could not be found.
The injection point has the following annotations: - @org.springframework.beans.factory.annotation.Autowired(required=true)
Action:
Consider defining a bean of type 'com.example.demo.biz.service.DemoService' in your configuration.
原因是找不到 DemoService 类
④ 在 DemoWebApplication 入口类中增加包扫描,设置 @SpringBootApplication 注解中的 scanBasePackages 值为 com.example.demo1
(scanBasePackages = "com.example.demo")
⑤ 设置完后重新运行 main 方法,项目正常启动,访问 http://localhost:8080/demo/test 测试接口
4.7 集成 MyBatis
以上接口均是静态的,不涉及数据库操作,下面将集成 MyBatis 访问数据库中的数据。
① 首先父 pom 文件中声明 mybatis-spring-boot-starter 及 lombok 依赖1
2
3
4
5
6
7
8
9
10<dependency>
<groupId>org.mybatis.spring.boot</groupId>
<artifactId>mybatis-spring-boot-starter</artifactId>
<version>1.3.2</version>
</dependency>
<dependency>
<groupId>org.projectlombok</groupId>
<artifactId>lombok</artifactId>
<version>1.16.22</version>
</dependency>
② 其次在 demo-dao 层中的 pom 文件中添加上述依赖1
2
3
4
5
6
7
8
9
10
11
12
13
14<dependencies>
<dependency>
<groupId>mysql</groupId>
<artifactId>mysql-connector-java</artifactId>
</dependency>
<dependency>
<groupId>org.mybatis.spring.boot</groupId>
<artifactId>mybatis-spring-boot-starter</artifactId>
</dependency>
<dependency>
<groupId>org.projectlombok</groupId>
<artifactId>lombok</artifactId>
</dependency>
</dependencies>
③ 之后在 demo-dao 层创建 com.example.demo.dao 包,通过 mybatis-genertaor 工具生成 dao 层相关文件( DO 、 Mapper 、 xml ),目录结构如下1
2
3
4
5
6
7
8
9
10
11
12
13
14
15
16
17
18|-- demo-dao
|-- pom.xml
|-- src
|-- main
| |-- java
| | |-- com
| | |-- example
| | |-- demo
| | |-- dao
| | |-- entity
| | | |-- UserDO.java
| | |-- mapper
| | |-- UserMapper.java
| |-- resources
| |-- mybatis
| |-- UserMapper.xml
|-- test
|-- java
④ 然后在 demo-web 层中的 resources 目录 创建 applicatio.properties 文件并在其中添加 datasource 及 MyBatis 相关配置项1
2
3
4
5
6
7spring.datasource.driverClassName = com.mysql.jdbc.Driver
spring.datasource.url = jdbc:mysql://localhost:3306/test?useUnicode=true&characterEncoding=utf-8
spring.datasource.username = test
spring.datasource.password = 123456
mybatis.mapper-locations = classpath:mybatis/*.xml
mybatis.type-aliases-package = com.example.demo.dao.entity
注:如果生成的 xml 在 dao 层 resources 目录的子目录中则 mybatis.mapper-locations 需设置为 classpath:mybatis/*/*.xml
⑤ DemoService 通过 @Autowired 注解注入 UserMapper ,修改 DemoService 的 test 方法使之调用 UserMapper 的 selectById 方法1
2
3
4
5
6
7
8
private UserMapper userMapper;
public String test() {
UserDO user = userMapper.selectById(1);
return user.toString();
}
⑥ 再次运行 DemoWebApplication 类中的 main 方法启动项目,出现如下报错1
2
3
4
5
6
7
8
9
10
11
12
13***************************
APPLICATION FAILED TO START
***************************
Description:
Field userMapper in com.example.demo.biz.service.impl.DemoServiceImpl required a bean of type 'com.example.demo.dao.mapper.business.UserMapper' that could not be found.
The injection point has the following annotations: - @org.springframework.beans.factory.annotation.Autowired(required=true)
Action:
Consider defining a bean of type 'com.example.demo.dao.mapper.business.UserMapper' in your configuration.
原因是找不到 UserMapper 类
⑦ 在 DemoWebApplication入口类中增加 dao 层包扫描,添加 @MapperScan 注解并设置其值为 com.example.demo.dao.mapper1
@MapperScan("com.example.demo.dao.mapper")
⑧ 设置完后重新运行 main 方法,项目正常启动,访问 http://localhost:8080/demo/test 测试接口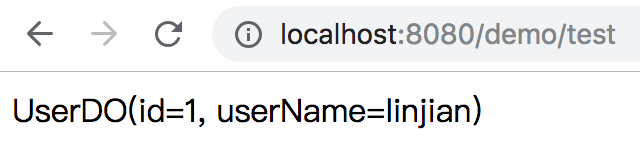
五、外部 Tomcat 部署 war 包
外部 Tomcat 部署的话,就不能依赖于入口类的 main 函数了,而是要以类似于 web.xml 文件配置的方式来启动 Spring应用上下文。
① 在入口类中继承 SpringBootServletInitializer 并实现 configure 方法1
2
3
4
5
6
7
8
9
10
11public class DemoWebApplication extends SpringBootServletInitializer {
protected SpringApplicationBuilder configure(SpringApplicationBuilder builder) {
return builder.sources(DemoWebApplication.class);
}
public static void main(String[] args) {
SpringApplication.run(DemoWebApplication.class, args);
}
}
② 之前在 demo-web 引入了 spring-boot-starter-web 的依赖,该依赖包包含内嵌的 Tomcat 容器,所以直接部署在外部 Tomcat 会冲突报错。这里在 demo-web 层中的 pom 文件中重定义 spring-boot-starter-tomcat 依赖包的「 scope 」即可解决该问题。1
2
3
4
5<dependency>
<groupId>org.springframework.boot</groupId>
<artifactId>spring-boot-starter-tomcat</artifactId>
<scope>provided</scope>
</dependency>
③ 声明 demo-web 层的打包方式及最终的包名1
2
3
4
5<packaging>war</packaging>
...省略其余部分...
<build>
<finalName>demo</finalName>
</build>
④ 此时在 demo-web 层目录执行「 mvn clean install 」即可打出一个名为 demo.war 的包。
六、Maven Profile 多环境打包
在日常开发中,通常不止一套环境,如开发环境、测试环境、预发环境、生成环境,而每个环境的配置项可能都不一样,这就需要用到多环境打包来解决这个问题。
① 在 demo-web 层的 resources 目录中新建 conf 目录,再在其中按照环境创建相应目录,这里创建开发环境「 dev 」及测试环境「 test 」,再将原本的 application.properties 文件分别拷贝一份到两个目录中,根据环境修改其中的配置项,最后删除原本的配置文件。得到目录结构如下:1
2
3
4
5
6|-- resources
|-- conf
|-- dev
| |-- application.properties
|-- test
|-- application.properties
② 往 demo-web 层的 pom 文件添加 profile 标签1
2
3
4
5
6
7
8
9
10
11
12
13
14
15
16
17<profiles>
<profile>
<id>dev</id>
<properties>
<profile.env>dev</profile.env>
</properties>
<activation>
<activeByDefault>true</activeByDefault>
</activation>
</profile>
<profile>
<id>test</id>
<properties>
<profile.env>test</profile.env>
</properties>
</profile>
</profiles>
注:其中 dev 为默认激活的 profile ,如要增加其他环境按照上述步骤操作即可。
③ 设置打包时资源文件路径1
2
3
4
5
6
7
8
9
10
11
12
13
14<build>
<finalName>demo</finalName>
<resources>
<resource>
<directory>${basedir}/src/main/resources</directory>
<excludes>
<exclude>conf/**</exclude>
</excludes>
</resource>
<resource>
<directory>src/main/resources/conf/${profile.env}</directory>
</resource>
</resources>
</build>
注:${basedir} 为当前子模块的根目录
④ 打包时通过「 P 」参数指定 profile1
mvn clean install -P test
七、自定义 archetype 模板
7.1 什么是 archetype 模板?
archetype 是一个 Maven 项目模板工具包,通过 archetype 我们可以快速搭建 Maven 项目。
每个模板里其实就是附带不同的依赖和插件。一般在公司私服里都会有属于本公司的一套 archetype 模板,里面有着调试好的项目用到的依赖包和版本号。
7.2 创建 archetype 模板
① cd 到项目根目录(即父 pom 文件所在目录)执行 mvn 命令,此时会在项目根目录生成 target 目录,其包含一个名为 generated-sources 的目录1
mvn archetype:create-from-project
② 打开「 /target/generated-sources/archetype/src/main/resources/META-INF/maven/ 」目录下的 archetype-metadata.xml 文件,从中清理一些不需要的文件,如 IDEA 的一些文件(.idea、.iml)等。1
2
3
4
5
6
7
8
9
10
11
12
13
14
15
16
17
18
19
20
21
22
23
24<fileSet filtered="true" encoding="UTF-8">
<directory>.idea/libraries</directory>
<includes>
<include>**/*.xml</include>
</includes>
</fileSet>
<fileSet filtered="true" encoding="UTF-8">
<directory>.idea/inspectionProfiles</directory>
<includes>
<include>**/*.xml</include>
</includes>
</fileSet>
<fileSet filtered="true" encoding="UTF-8">
<directory>.idea/artifacts</directory>
<includes>
<include>**/*.xml</include>
</includes>
</fileSet>
<fileSet filtered="true" encoding="UTF-8">
<directory>.idea</directory>
<includes>
<include>**/*.xml</include>
</includes>
</fileSet>
③ 然后 cd target/generated-sources/archetype/,然后执行 install 命令,在本地仓库的根目录生成 archetype-catalog.xml 骨架配置文件1
mvn install
文件内容如下:1
2
3
4
5
6
7
8
9
10
11
12
13
<archetype-catalog xsi:schemaLocation="http://maven.apache.org/plugins/maven-archetype-plugin/archetype-catalog/1.0.0 http://maven.apache.org/xsd/archetype-catalog-1.0.0.xsd"
xmlns="http://maven.apache.org/plugins/maven-archetype-plugin/archetype-catalog/1.0.0"
xmlns:xsi="http://www.w3.org/2001/XMLSchema-instance">
<archetypes>
<archetype>
<groupId>com.example.demo</groupId>
<artifactId>demo-archetype</artifactId>
<version>0.0.1-SNAPSHOT</version>
<description>demo</description>
</archetype>
</archetypes>
</archetype-catalog>
7.3 使用 archetype 模板
到本机的工作目录执行 mvn archetype:generate -DarchetypeCatalog=local 从本地 archeType 模板中创建项目1
2
3
4
5
6
7
8
9
10
11
12
13
14
15
16
17
18
19
20
21
22
23
24
25
26
27
28
29
30
31
32
33
34
35
36
37
38
39
40
41
42
43
44
45
46
47
48
49
50
51
52
53~/Workspace/JAVA $ mvn archetype:generate -DarchetypeCatalog=local
[INFO] Scanning for projects...
[INFO]
[INFO] Using the builder org.apache.maven.lifecycle.internal.builder.singlethreaded.SingleThreadedBuilder with a thread count of 1
[INFO]
[INFO] ------------------------------------------------------------------------
[INFO] Building Maven Stub Project (No POM) 1
[INFO] ------------------------------------------------------------------------
[INFO]
[INFO] >>> maven-archetype-plugin:3.0.1:generate (default-cli) @ standalone-pom >>>
[INFO]
[INFO] <<< maven-archetype-plugin:3.0.1:generate (default-cli) @ standalone-pom <<<
[INFO]
[INFO] --- maven-archetype-plugin:3.0.1:generate (default-cli) @ standalone-pom ---
[INFO] Generating project in Interactive mode
[INFO] No archetype defined. Using maven-archetype-quickstart (org.apache.maven.archetypes:maven-archetype-quickstart:1.0)
Choose archetype:
1: local -> com.example.demo:demo-archetype (demo)
Choose a number or apply filter (format: [groupId:]artifactId, case sensitive contains): : 1
Define value for property 'groupId': com.orz.test
Define value for property 'artifactId': test
Define value for property 'version' 1.0-SNAPSHOT: :
Define value for property 'package' com.orz.test: :
Confirm properties configuration:
groupId: com.orz.test
artifactId: test
version: 1.0-SNAPSHOT
package: com.orz.test
Y: : y
[INFO] ----------------------------------------------------------------------------
[INFO] Using following parameters for creating project from Archetype: demo-archetype:0.0.1-SNAPSHOT
[INFO] ----------------------------------------------------------------------------
[INFO] Parameter: groupId, Value: com.orz.test
[INFO] Parameter: artifactId, Value: test
[INFO] Parameter: version, Value: 1.0-SNAPSHOT
[INFO] Parameter: package, Value: com.orz.test
[INFO] Parameter: packageInPathFormat, Value: com/orz/test
[INFO] Parameter: package, Value: com.orz.test
[INFO] Parameter: version, Value: 1.0-SNAPSHOT
[INFO] Parameter: groupId, Value: com.orz.test
[INFO] Parameter: artifactId, Value: test
[INFO] Parent element not overwritten in /Users/linjian/Workspace/JAVA/test/test-biz/pom.xml
[INFO] Parent element not overwritten in /Users/linjian/Workspace/JAVA/test/test-common/pom.xml
[INFO] Parent element not overwritten in /Users/linjian/Workspace/JAVA/test/test-dao/pom.xml
[INFO] Parent element not overwritten in /Users/linjian/Workspace/JAVA/test/test-web/pom.xml
[INFO] Project created from Archetype in dir: /Users/linjian/Workspace/JAVA/test
[INFO] ------------------------------------------------------------------------
[INFO] BUILD SUCCESS
[INFO] ------------------------------------------------------------------------
[INFO] Total time: 01:01 min
[INFO] Finished at: 2019-01-15T18:51:31+08:00
[INFO] Final Memory: 14M/155M
[INFO] ------------------------------------------------------------------------
上面罗列出了所有可用的模板,首先选择使用哪个模板,这里选择 1 ,其次输入「 groupId 」、「 articleId 」、「 version 」及「 package 」,然后输入「 Y 」确认创建,最终项目创建成功。
八、结语
至此 Spring Boot Maven 多模块项目的搭建过程已经介绍完毕,后续会在此基础上继续集成一些中间件。