一、前言
上篇介绍了 Redis 的集成过程,可用于解决热点数据访问的性能问题。随着业务复杂度的提高,单体应用越来越庞大,就好比一个类的代码行数越来越多,分而治之,切成多个类应该是更好的解决方法,所以一个庞大的单体应用分出多个小应用也更符合这种分治的思想。于是乎微服务化的概念油然而生,微服务化的第一步就是选择适用的分布式服务框架,基于团队成员有使用过「 Dubbo 」的经验,我们放弃了完全陌生的「 Spring Cloud 」。本篇将主要介绍在 Spring Boot 中集成 Dubbo 的过程。
二、集成 Dubbo
2.1 引入 Dubbo 依赖包
① 首先在项目父 pom 文件中声明 Dubbo 依赖。1
2
3
4
5
6
7
8
9
10<dependencyManagement>
<dependencies>
...省略其余部分...
<dependency>
<groupId>com.alibaba.boot</groupId>
<artifactId>dubbo-spring-boot-starter</artifactId>
<version>0.2.0</version>
</dependency>
</dependencies>
</dependencyManagement>
② 其次在 demo-biz 层中的 pom 文件添加上述 Dubbo 依赖。1
2
3
4
5
6
7<dependencies>
...省略其余部分...
<dependency>
<groupId>com.alibaba.boot</groupId>
<artifactId>dubbo-spring-boot-starter</artifactId>
</dependency>
</dependencies>
2.2 添加 Dubbo 常用配置项
在 application.properties 文件中的添加 Dubbo 相关的配置项:1
2
3
4
5
6
7
8
9
10
11
12
13
14
15
16
17
18
19
20# 当前应用名称,用于注册中心计算应用间依赖关系
dubbo.application.name = demo
# 组织名称,用于注册中心区分服务来源
dubbo.application.organization = example
# 应用负责人,用于服务治理
dubbo.application.owner = linjian
# 注册中心地址协议
dubbo.registry.protocol = zookeeper
# 注册中心服务器地址
dubbo.registry.address = 127.0.0.1:2181
# 协议名称
dubbo.protocol.name = dubbo
# 服务端口
dubbo.protocol.port = 20880
# 服务版本
dubbo.provider.version = 1.0.0.dev
# 远程服务调用超时时间(毫秒)
dubbo.provider.timeout = 60000
# 启动时检查提供者是否存在
dubbo.consumer.check = false
注:详细配置见 官方配置参考手册
三、接口服务化
3.1 Dubbo 接口编程规约
- Dubbo 接口类以 Rpc 为前缀命名并剥离出一个单独的模块,称之为远程服务层
- 请求参数类以 Param 为后缀命名并统一存放于「 param 」目录
- 返回结果类以 DTO 为后缀命名并统一存放于「 result 」目录
- 统一返回值格式,详见 开发规约(一)接口统一返回值格式
3.2 创建远程服务层
① 首先按照该篇博客 Spring Boot 项目实战(一)Maven 多模块项目搭建 中的「4.2 创建子模块」一节添加「 demo-remote 」子模块。
② 其次在项目父 pom 文件的 dependencyManagement 标签中声明 demo-remote 子模块的依赖。1
2
3
4
5<dependency>
<groupId>com.example.demo</groupId>
<artifactId>demo-remote</artifactId>
<version>${demo.version}</version>
</dependency>
③ 然后在 demo-biz 层中的 pom 文件中添加 demo-remote 依赖。1
2
3
4
5
6
7<dependencies>
...省略其余部分...
<dependency>
<groupId>com.example.demo</groupId>
<artifactId>demo-remote</artifactId>
</dependency>
</dependencies>
由于 demo-remote 层最终是要打成一个 JAR 包供外部引入,而其接口的内部实现还是需要写在 demo-biz 层,所以我们将这两个模块之间建立了依赖关系,并在 demo-biz 层 com.example.demo.biz.service.impl 包中,新建 remote 目录存放 demo-remote 层远程服务接口的具体实现。
④ 在 DemoWebApplication 入口类中增加 Dubbo 接口实现类包扫描,设置 @DubboComponentScan 注解中的 basePackages 值为 com.example.demo.biz.service.impl.remote1
(basePackages = "com.example.demo.biz.service.impl.remote")
3.3 简易 Dubbo 接口测试
配置完模块间的依赖关系后,我们通过一个简易的 Dubbo 接口测试是否可用。
① 首先在 demo-remote 层的 pom 文件中添加必要的 lombok 依赖1
2
3
4
5
6<dependencies>
<dependency>
<groupId>org.projectlombok</groupId>
<artifactId>lombok</artifactId>
</dependency>
</dependencies>
① 其次在该层创建 com.example.demo.remote 包,添加 param 目录并在其中创建 DemoParam 请求参数类,添加 result 目录并在其中创建 DemoDTO 返回结果类,添加 service 目录并在其中创建 RpcDemoService 接口类。1
2
3
4
5
6
7
8
9
10
11
12
13
14
15package com.example.demo.remote.model.param;
import lombok.Data;
import java.io.Serializable;
/**
* @author linjian
* @date 2019/3/15
*/
public class DemoParam implements Serializable {
private Integer id;
}
1 | package com.example.demo.remote.model.result; |
1 | package com.example.demo.remote.service; |
② 在 demo-biz 层 com.example.demo.biz.service.impl.remote 包中新建 RpcDemoServiceImpl 接口实现类。1
2
3
4
5
6
7
8
9
10
11
12
13
14
15
16
17
18
19
20
21
22
23
24
25
26package com.example.demo.biz.service.impl.remote;
import com.alibaba.dubbo.config.annotation.Service;
import com.example.demo.biz.service.DemoService;
import com.example.demo.remote.model.param.DemoParam;
import com.example.demo.remote.model.result.DemoDTO;
import com.example.demo.remote.service.RpcDemoService;
import org.springframework.beans.factory.annotation.Autowired;
/**
* @author linjian
* @date 2019/3/15
*/
public class RpcDemoServiceImpl implements RpcDemoService {
private DemoService demoService;
public DemoDTO test(DemoParam param) {
DemoDTO demo = new DemoDTO();
demo.setStr(demoService.test());
return demo;
}
}
③ 运行 DemoWebApplication 启动类的 main 方法,查看控制台打印日志可以得到如下结果: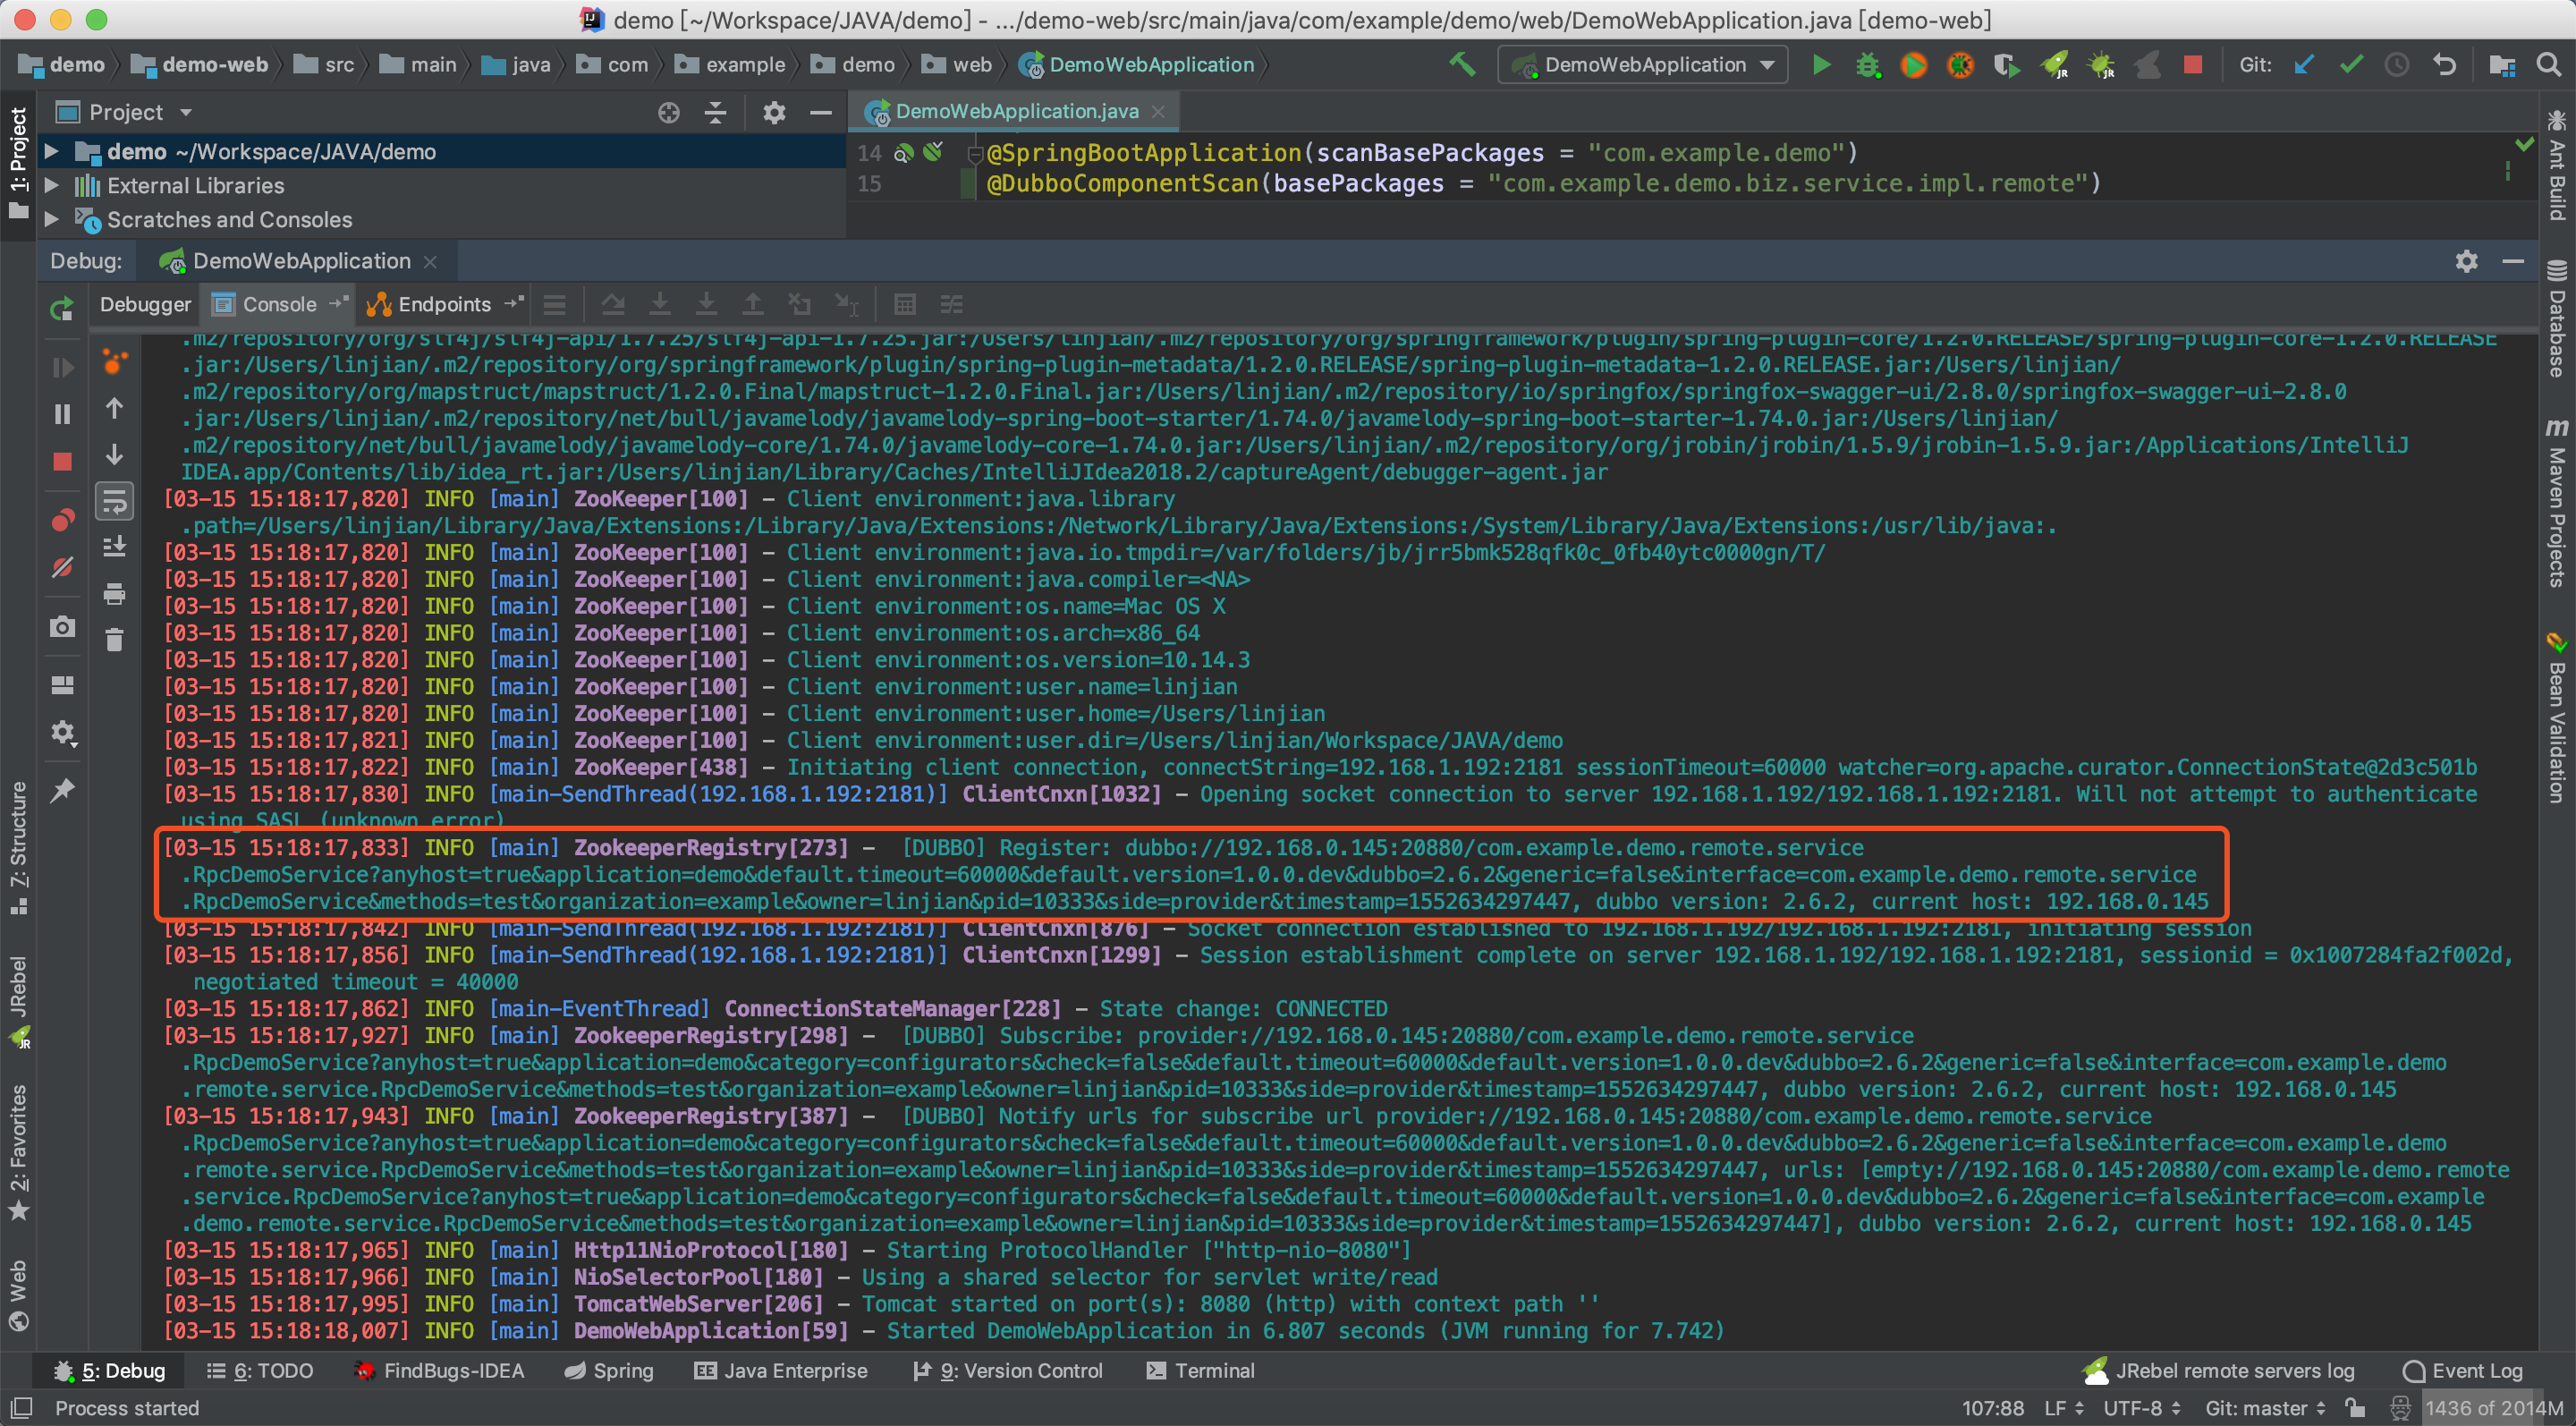
从上图可以看出服务已经注册成功
④ 同时通过 Dubbo Admin 管理控制台也可以看到刚注册的服务: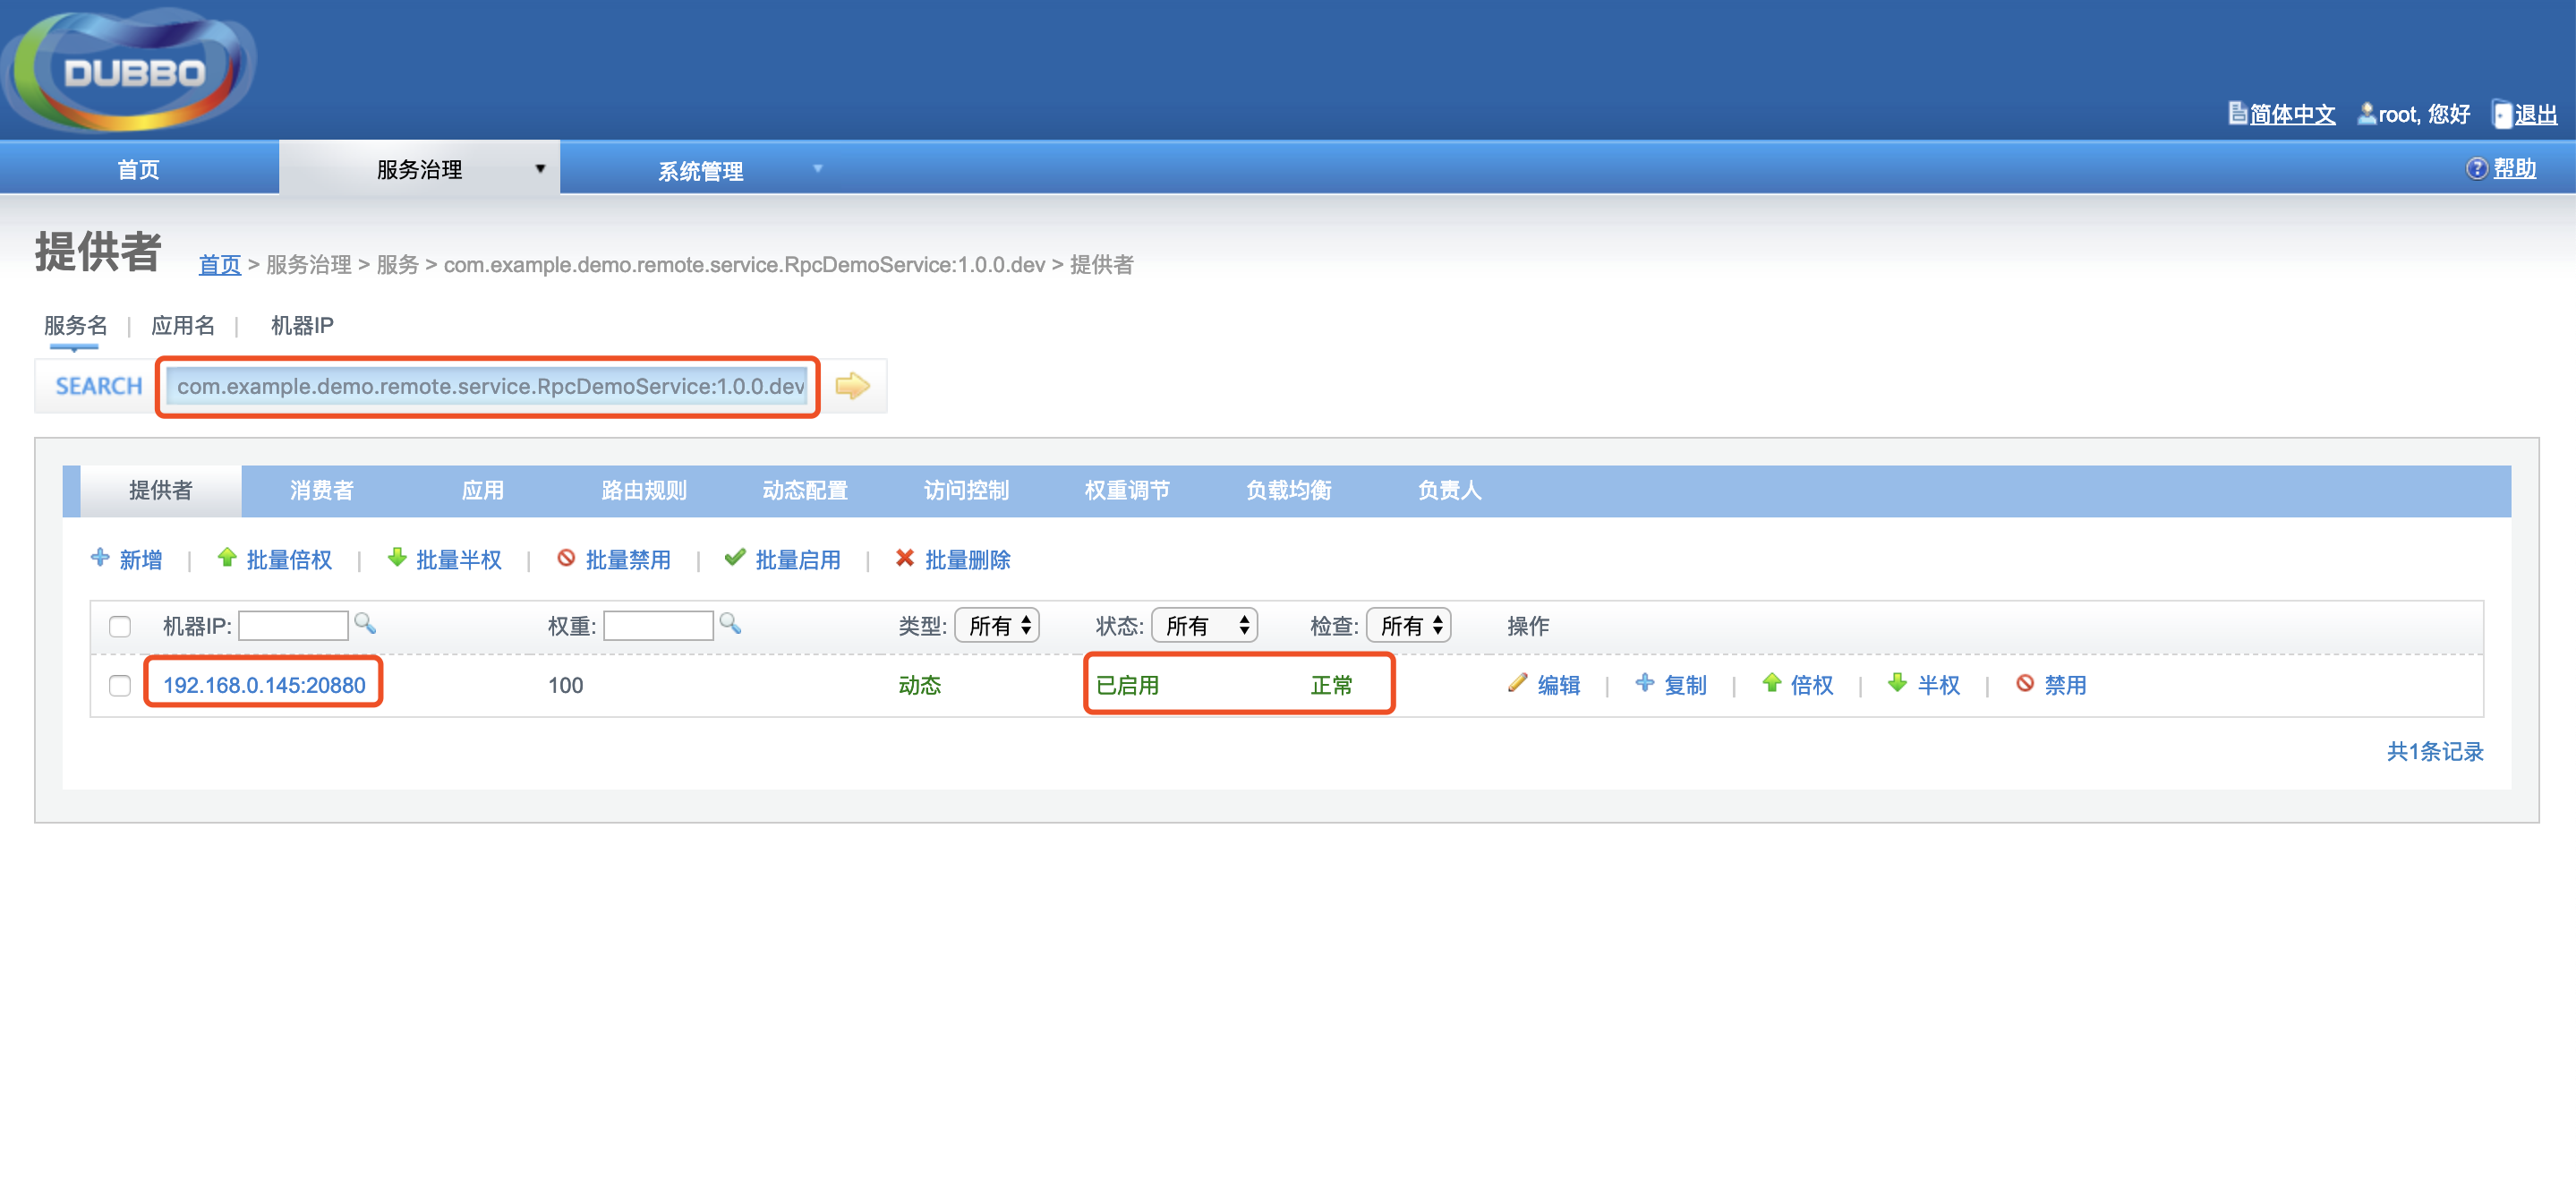
3.4 暴露远程服务
① 在 demo-remote 层的 pom 文件中添加 distributionManagement 标签并在其中配置 Nexus 私服的 snapshot 快照库及 release 发布库。1
2
3
4
5
6
7
8
9
10<distributionManagement>
<repository>
<id>yibao-releases</id>
<url>http://127.0.0.1:8081/nexus/content/repositories/releases/</url>
</repository>
<snapshotRepository>
<id>yibao-snapshots</id>
<url>http://127.0.0.1:8081/nexus/content/repositories/snapshots/</url>
</snapshotRepository>
</distributionManagement>
② cd 到 demo-remote 目录,执行 mvn deploy 命令打包,完成后可在 Nexus 私服看到刚打的依赖包。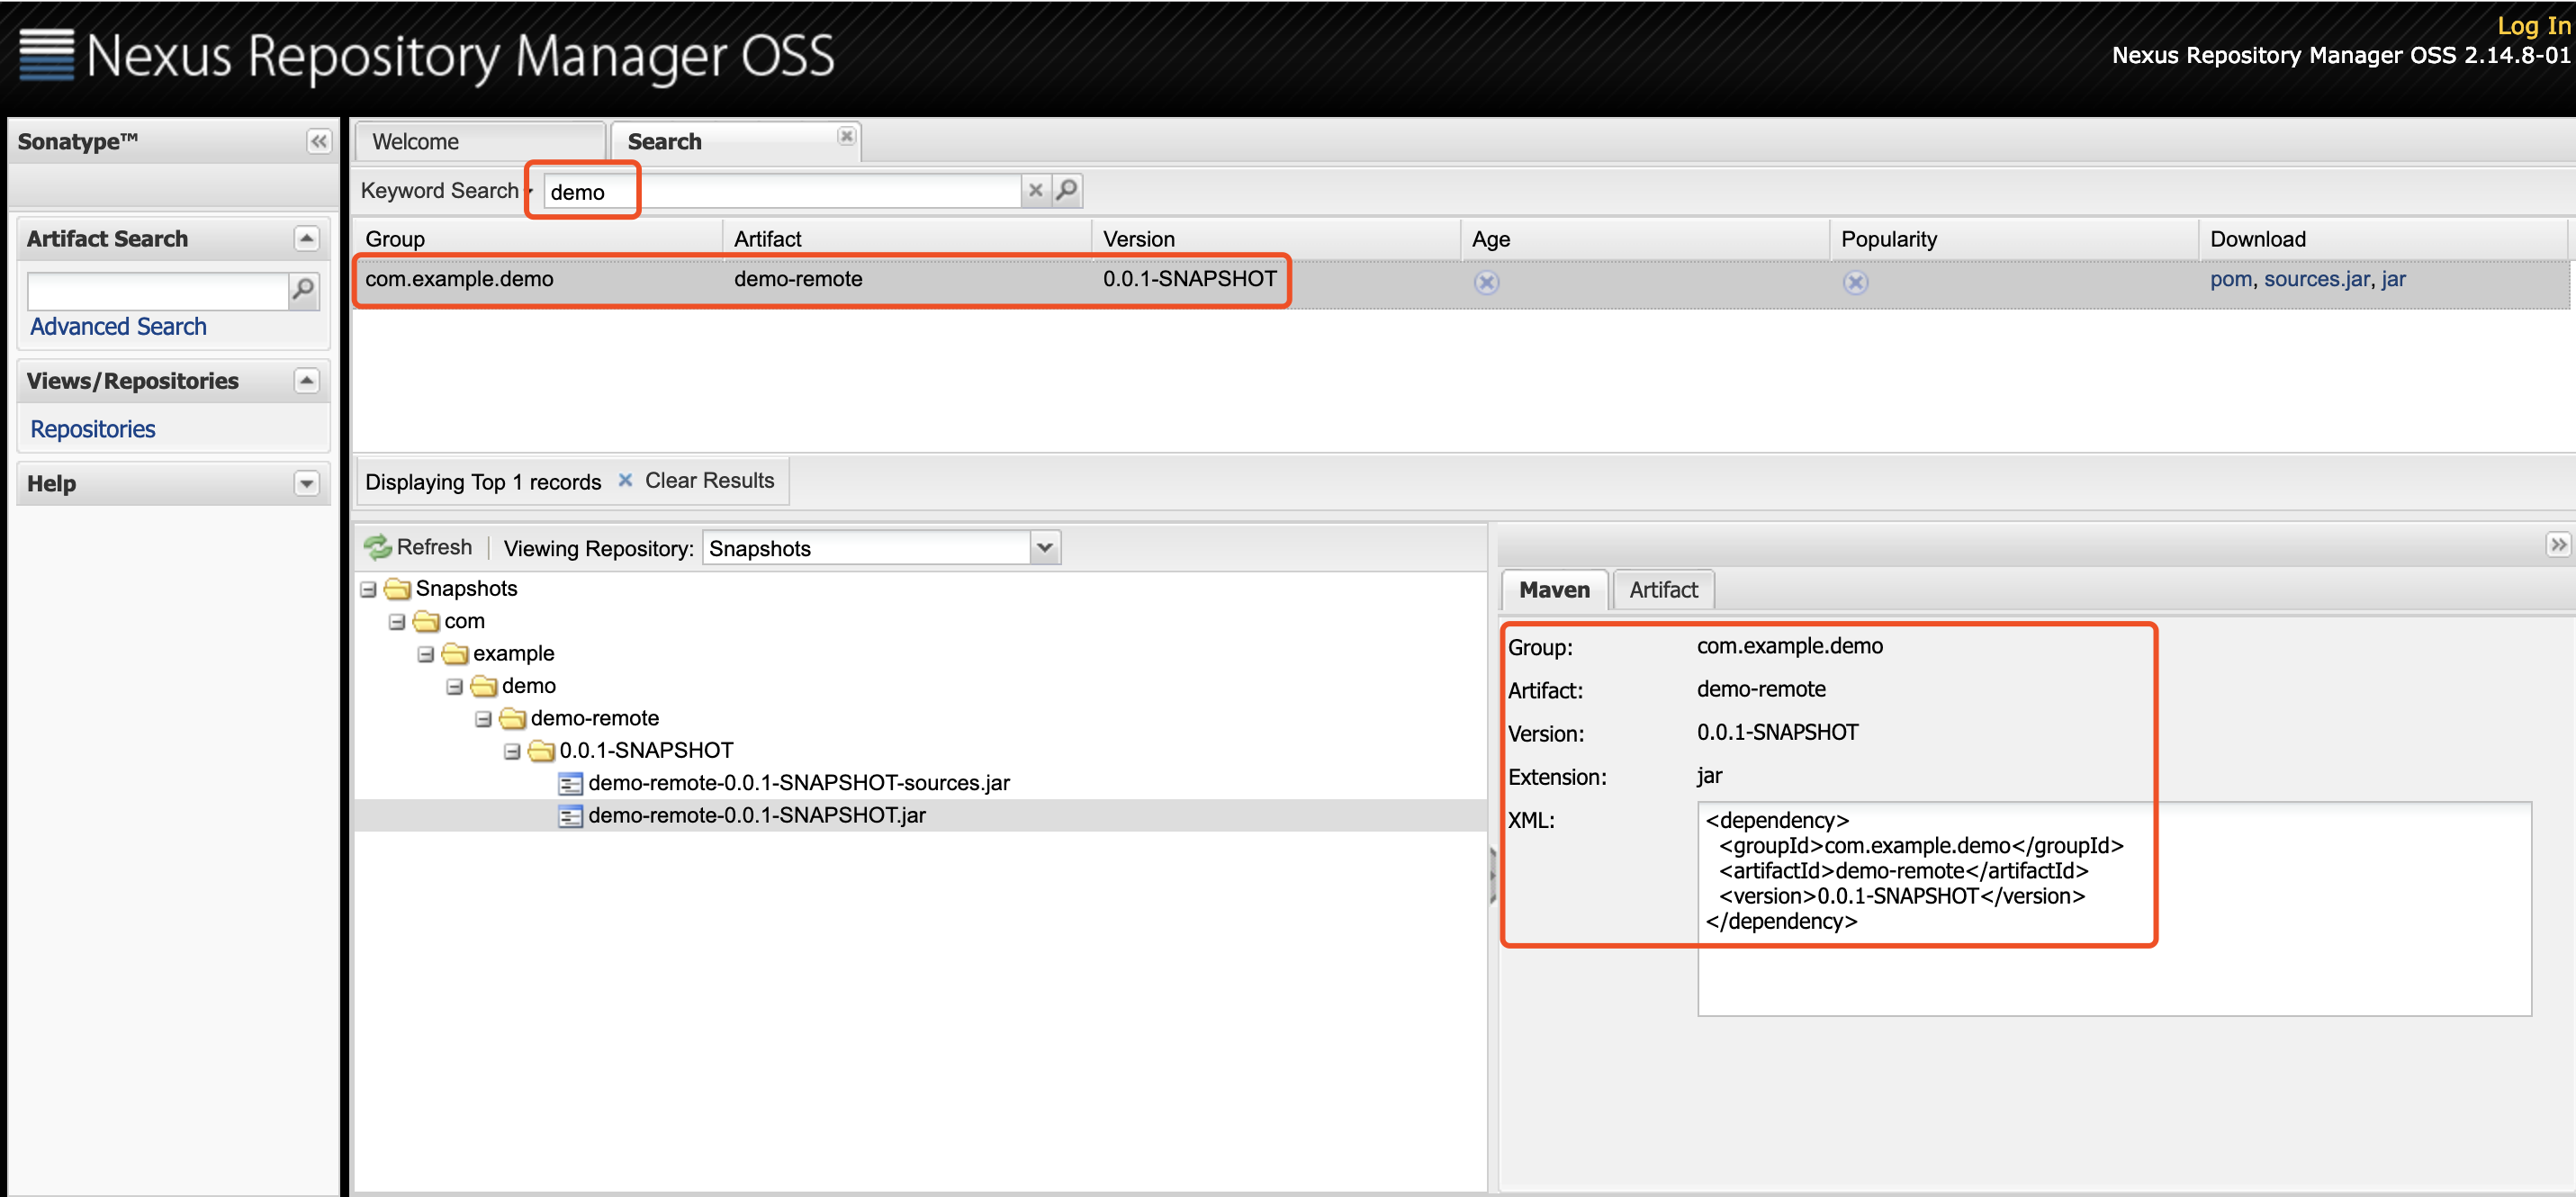
③ 搭建一个测试项目并引入 demo-remote 依赖包,新建 TestController 类测试 Dubbo 接口。
注:该测试项目也需集成 Dubbo
1 | package com.example.dawn.web.controller; |
③ 启动测试项目,观察 Dubbo Admin 管理控制台消费者一栏,可以看到测试项目已经作为一个消费者调用 RpcDemoService 接口类。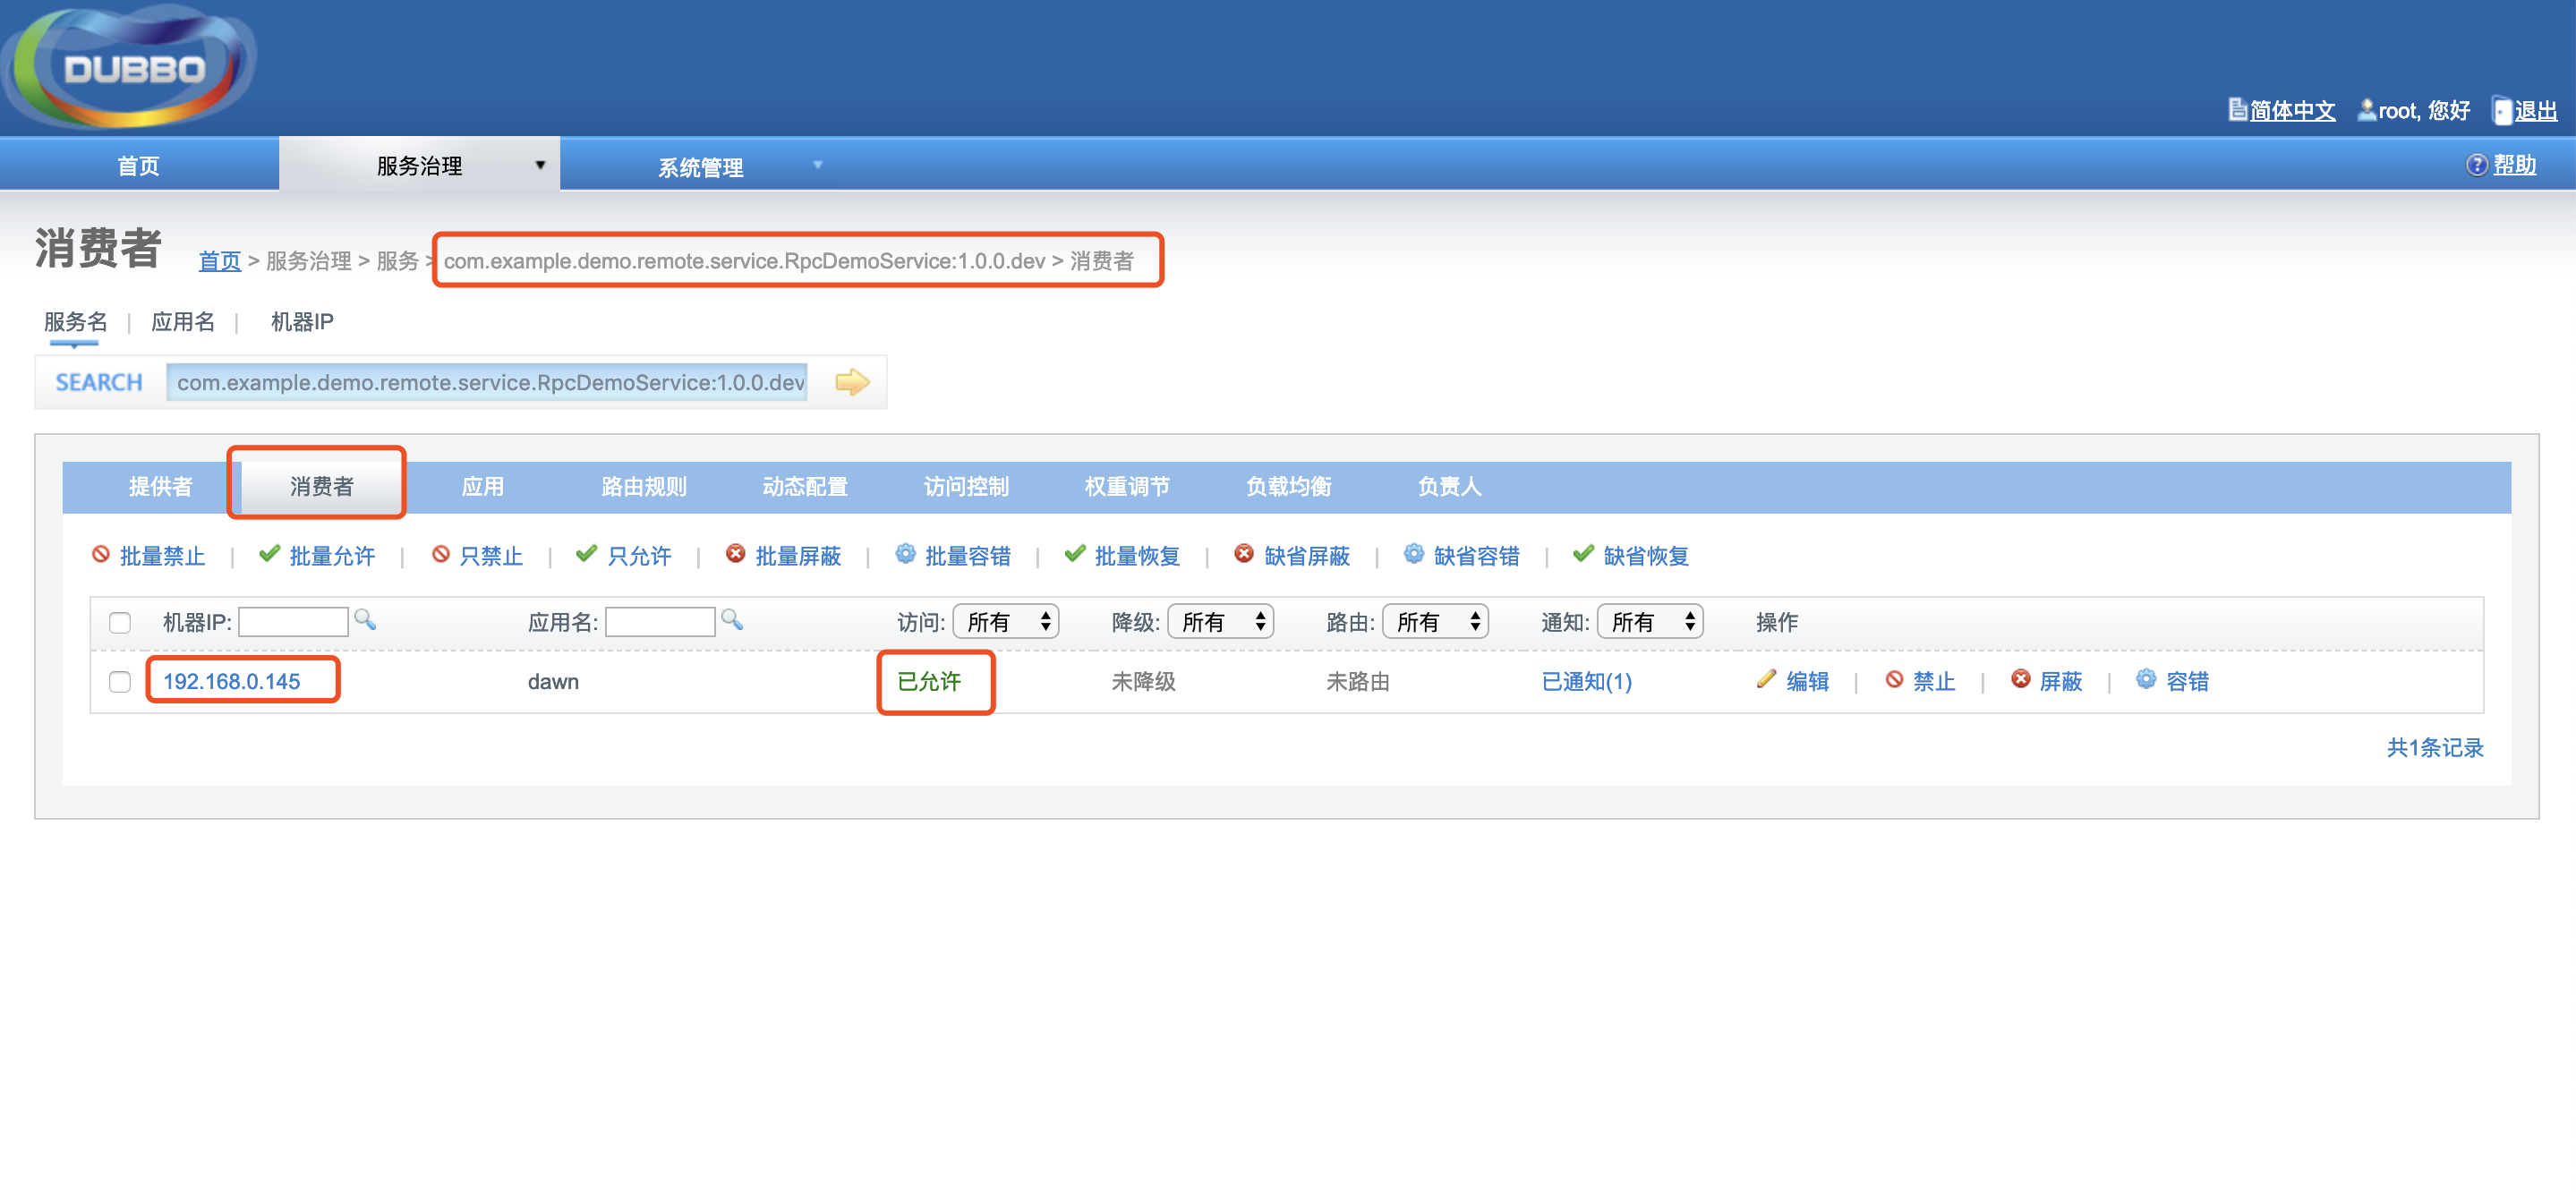
④ 访问 http://localhost:8079/test/dubbo 查看接口返回结果。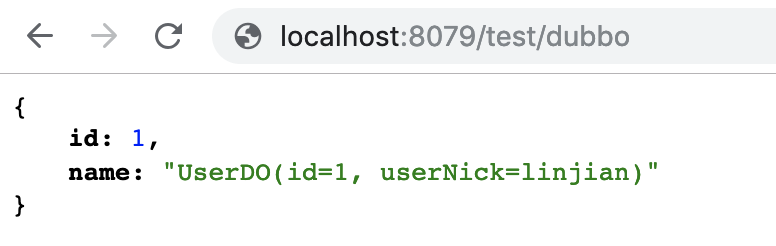
四、结语
至此 Spring Boot 集成 Dubbo 的过程介绍完毕,我们通过一个简易的 Dubbo 接口测试其可用性,相关代码已同步至 GitHub 。